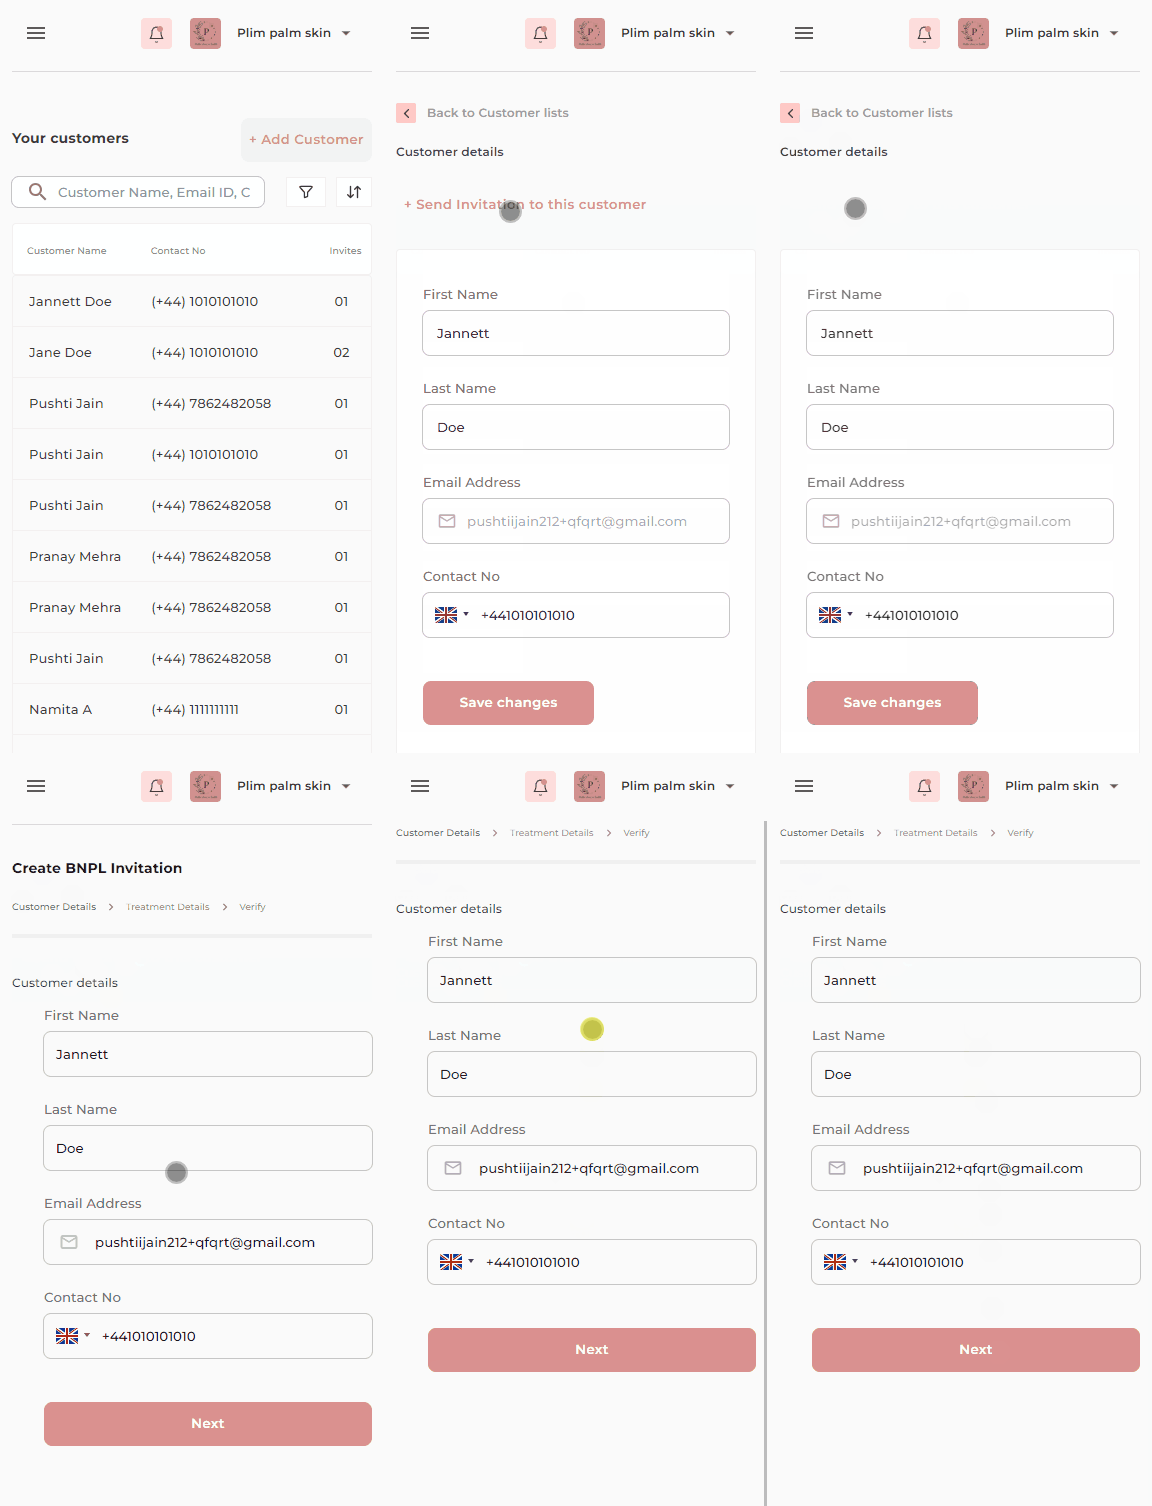
Open the dashboard and click on "Customer Details" in the left panel. This will lead you to a table that displays various customer information such as names, email IDs, contact numbers, and their associated BNPL invitations. To streamline your view, make use of the sorting and search options available.
Customer Details: Send Invites to existing customers
4 Steps
In this article, we will guide you through managing customer details in relation to your BNPL invitations. Follow these steps:
Step 1: Go to customer details


Step 2: Click on relevant customer
Click on any customer's row to access more detailed information. Note that while you can modify their phone number, other data remains unchangeable. On the left side, you'll find their specific details. Meanwhile, on the right side, there's a comprehensive list of BNPL invitations, complete with their various statuses.


Step 3: Send Invites
Should you wish to send an invitation directly to a customer, locate the "Send Invitation" option and click on it


Step 4: Removing or deleting a customer's detail
If you need to remove a customer from your records, you can click on the delete icon. However, this is only feasible if the customer has no associated invitations. This practice helps maintain efficient and organized customer management.


Was it helpful?