Begin by opening the left panel of your dashboard and selecting "Employees." Look for the "Add Employee" button at the table's upper right corner, then proceed to click on it.
Add Your Employees
6 Steps
In this guide, we'll explore how administrators can seamlessly incorporate diverse team members into a shared account structure. This ensures effective task distribution while maintaining strict safeguards over critical financial and transactional data, exclusively accessible to admins only.
Step 1 - Accessing Employee Section

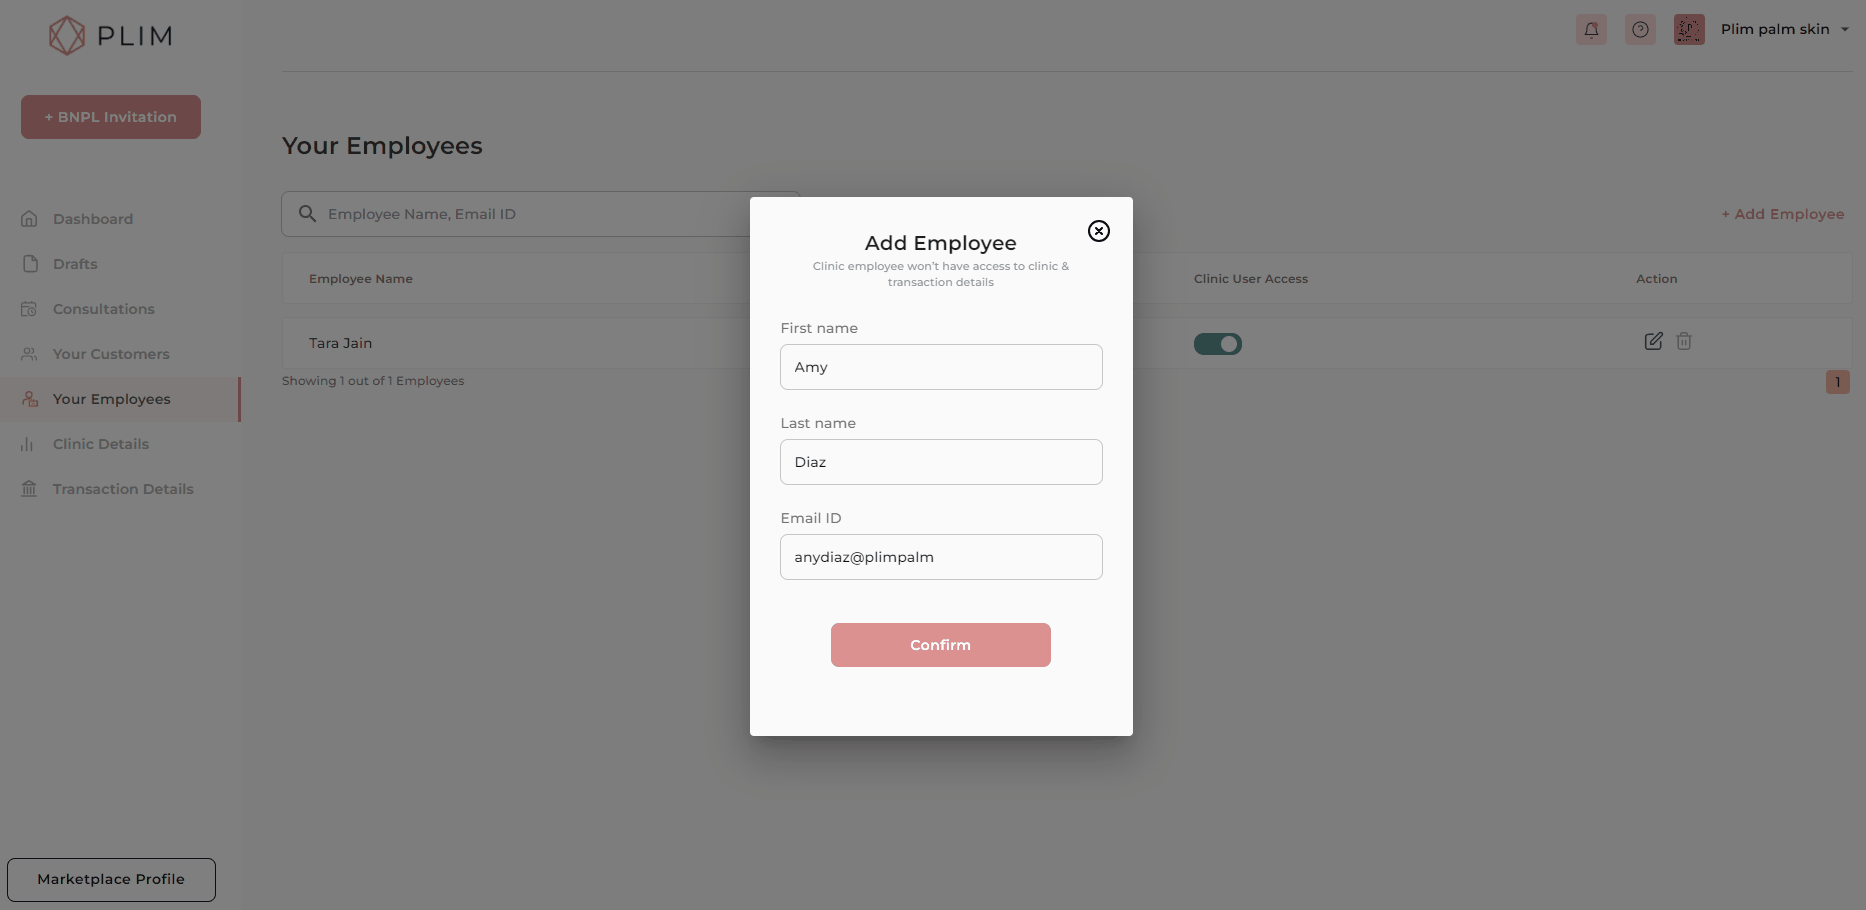
Step 2 - Providing Employee Details
Fill in the employee's first name, last name, and email ID, which they will use to access the dashboard. Once completed, hit "Submit" to initiate the process.

Step 3 - Editing and Managing Requests
Modify employee details by editing their name. You can also delete a request or resend a joining invitation if an employee hasn't yet joined.


Step 4 - Employee Activation
The employee will receive an email with a "Join" button. Upon clicking, they'll set a password and gain access to the dashboard, excluding financial data.


Step 5 - Monitoring Employee Status
An active employee will display a green "Active" toggle. Admins can use this toggle to deactivate accounts or delete them if necessary.


Step 6 - Enhanced Invitation Management
Utilize the "Invite Sent By" filter in the BNPL invitation table to categorize and track invitations sent by specific employees.


Was it helpful?
Watch tutorial instead

