Upload Treatment images, clinic photos, showcase achievements and the team on PLIM Marketplace by uploading images and adding necessary description.
Marketplace Details: Uploading Media
2 Parts
This guide will walk you through the process of uploading media to enhance your clinic's profile on the marketplace. Your uploaded data will be visible on your marketplace account.
PART A Upload Media
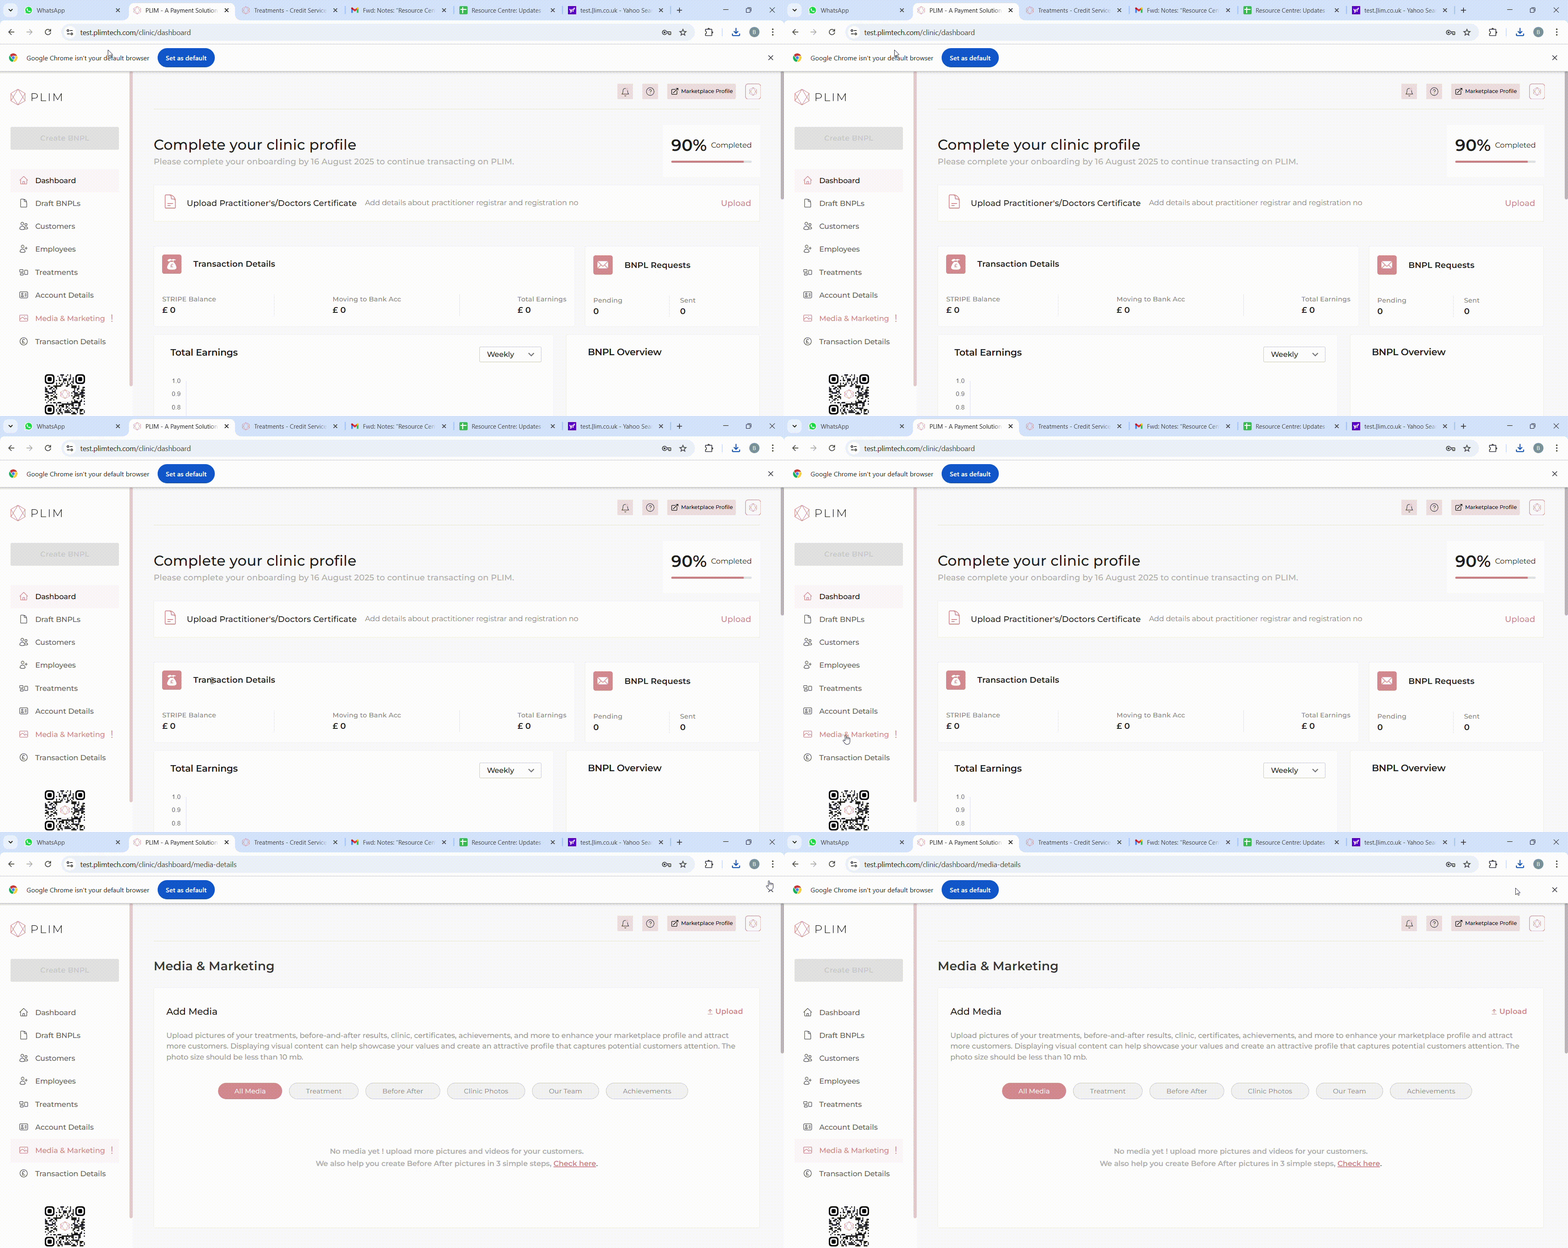
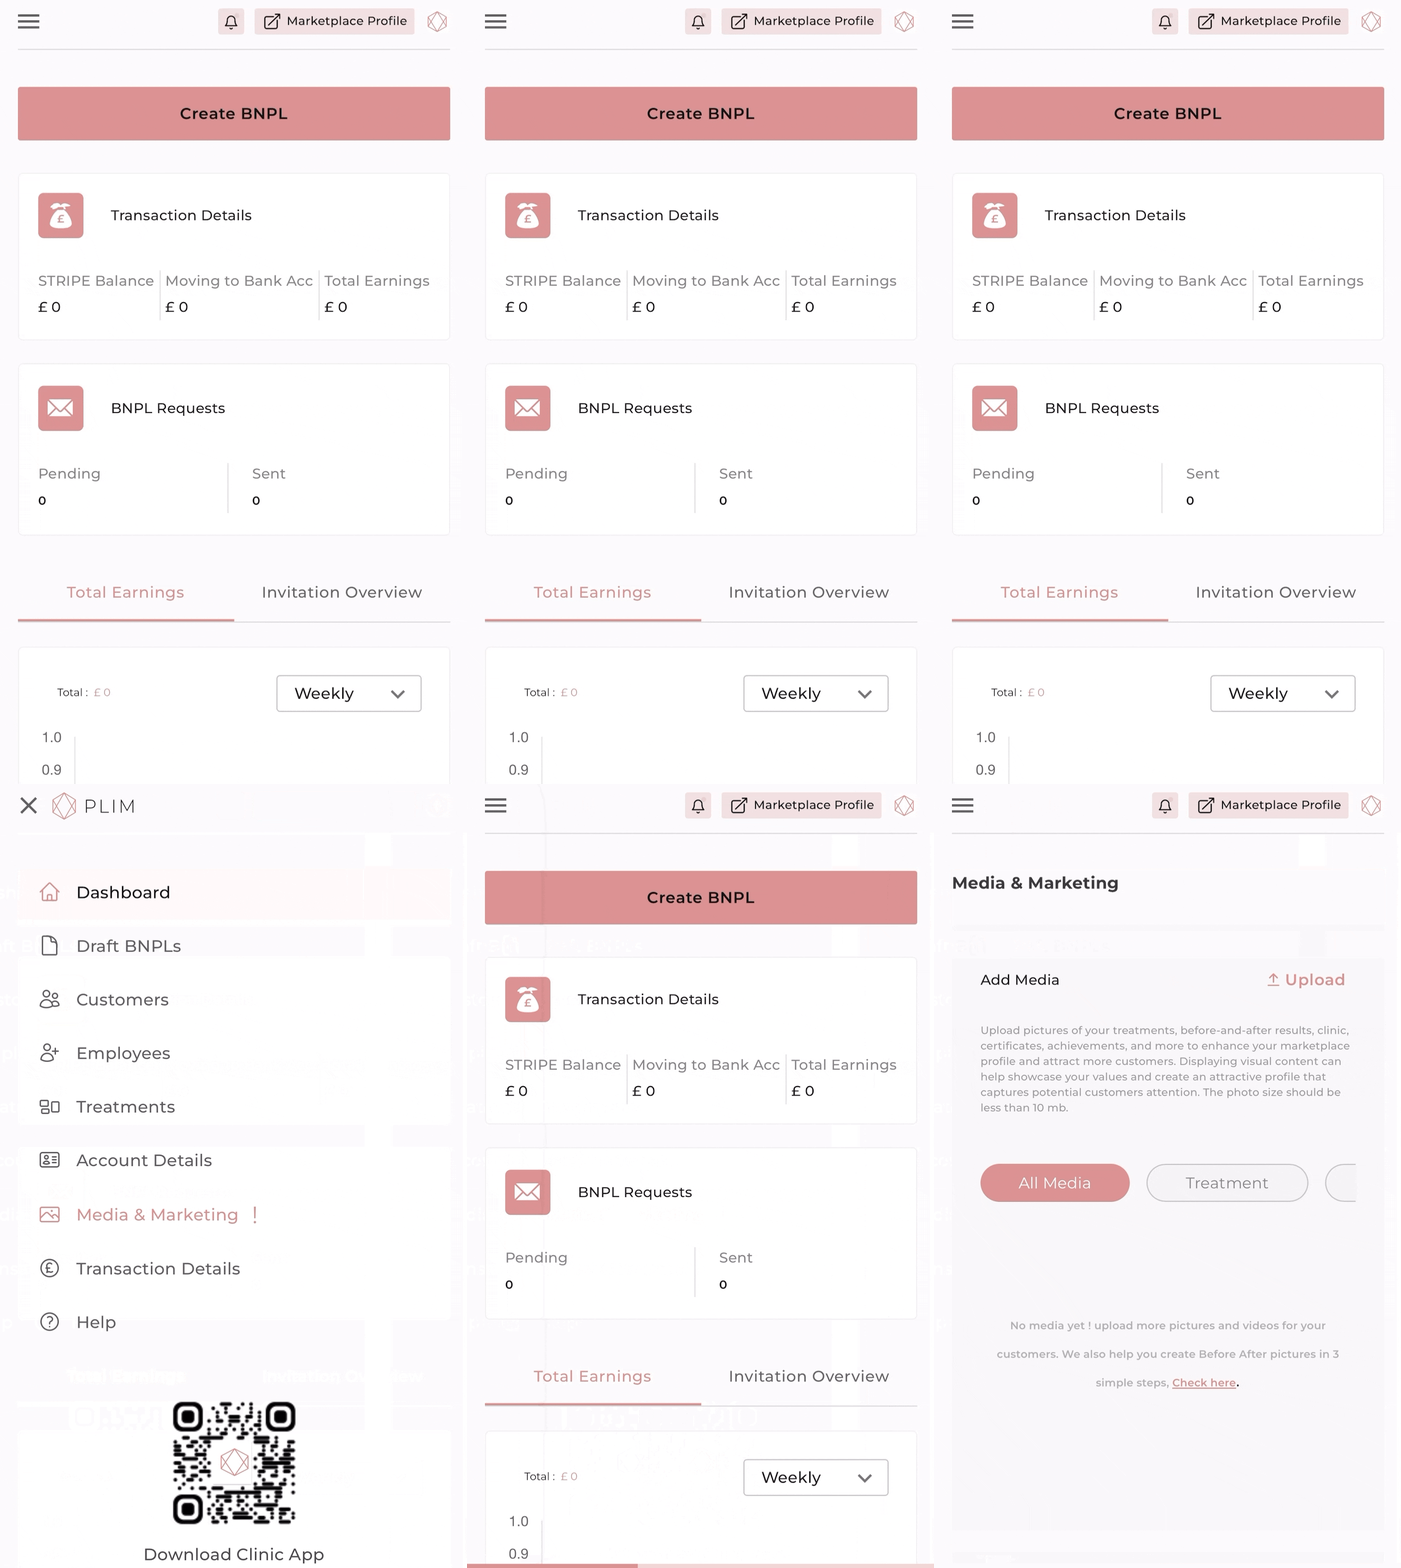
Step 1 Navigate to the media and marketing section
Begin by navigating to the Media and Marketing section of your dashboard. This section will contain all the information you can add to enhance your marketplace presence.
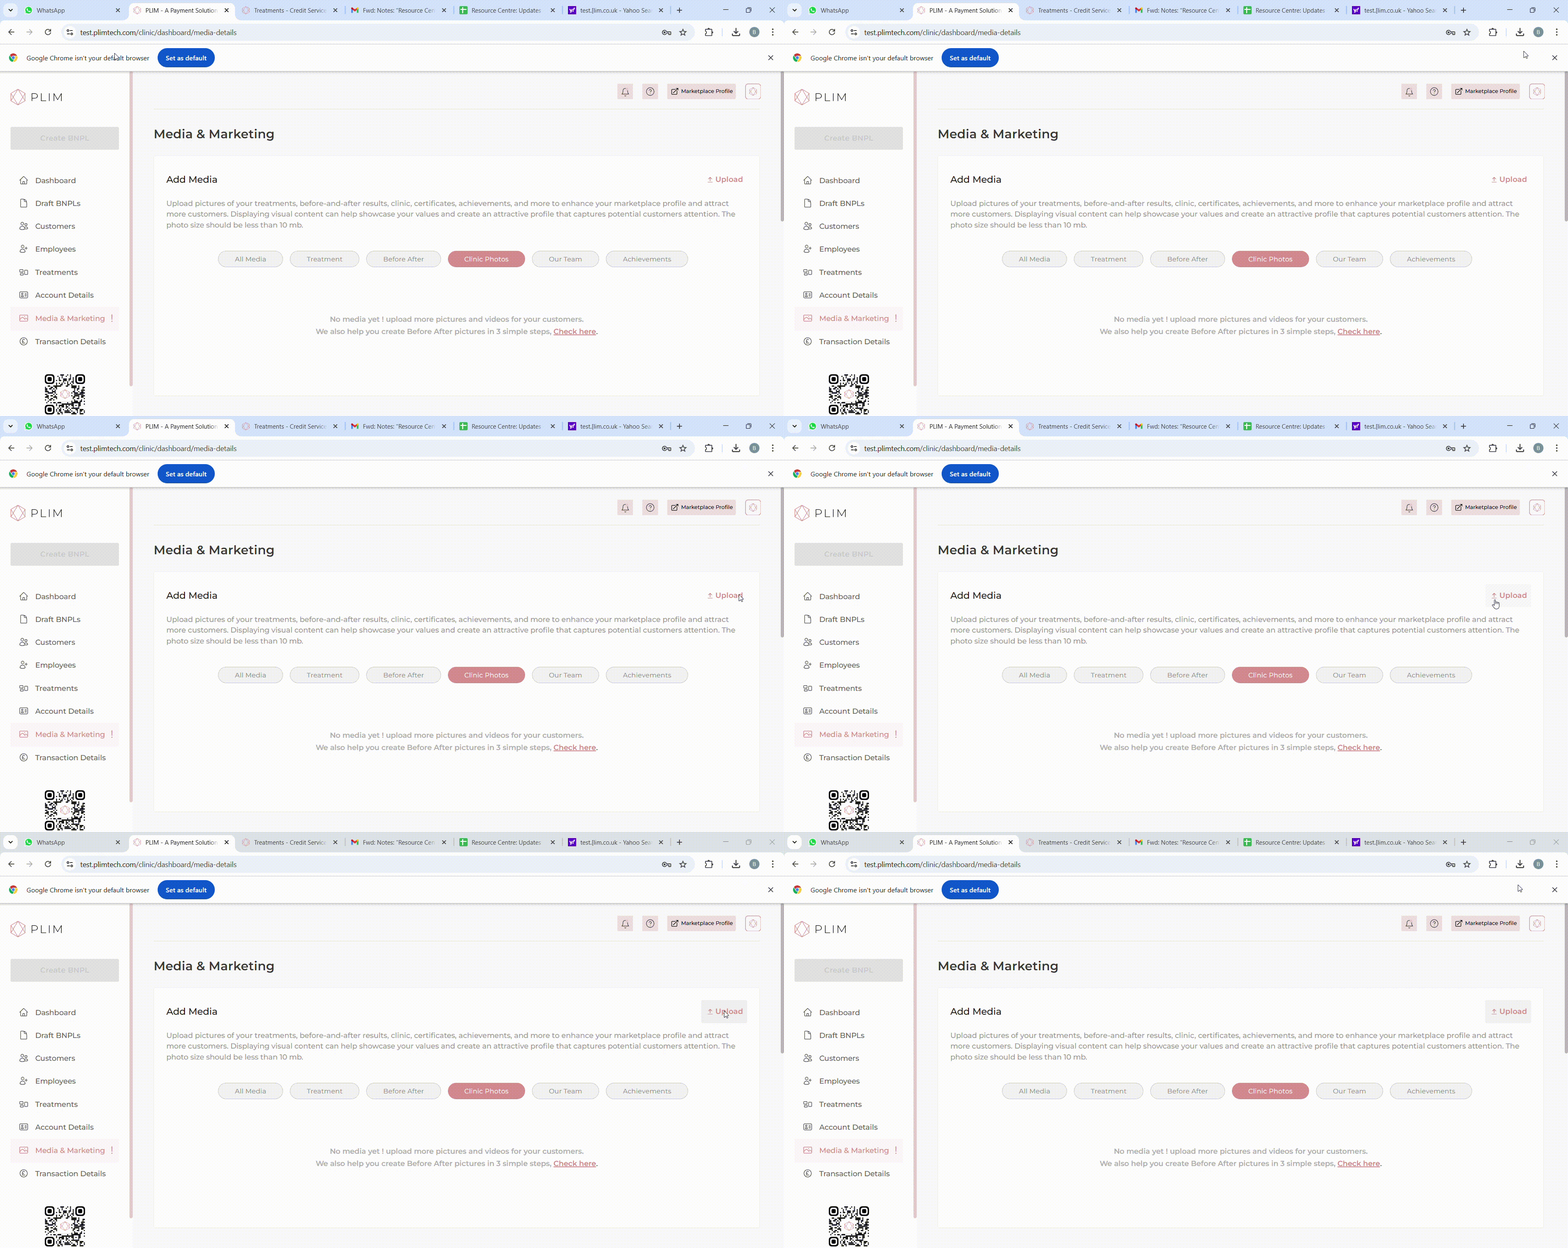
Step 2 Upload Media
Click on the "Upload" button located at the top left corner. A pop-up browser will appear, allowing you to select your JPEG format photos and videos (up to 3MB). Click "Continue" and review the images uploaded.
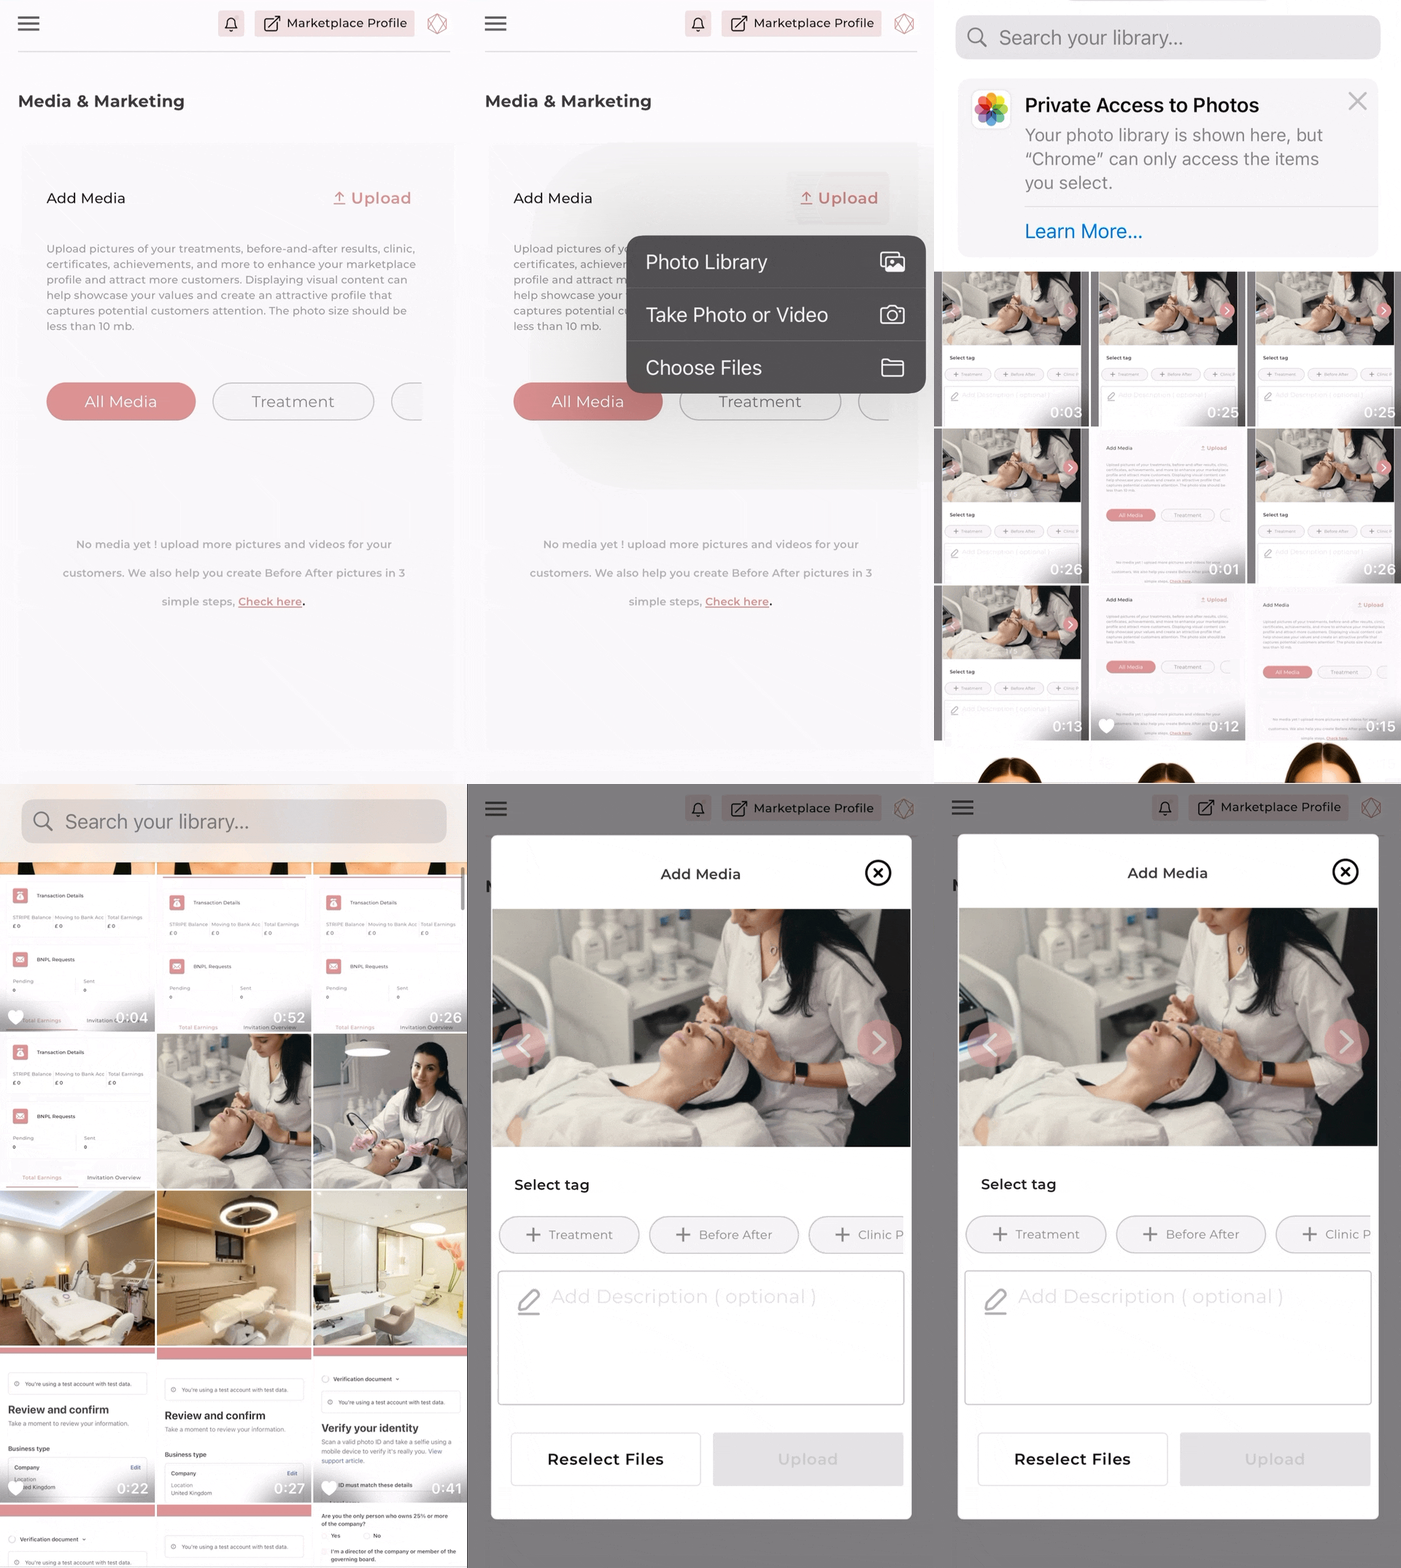
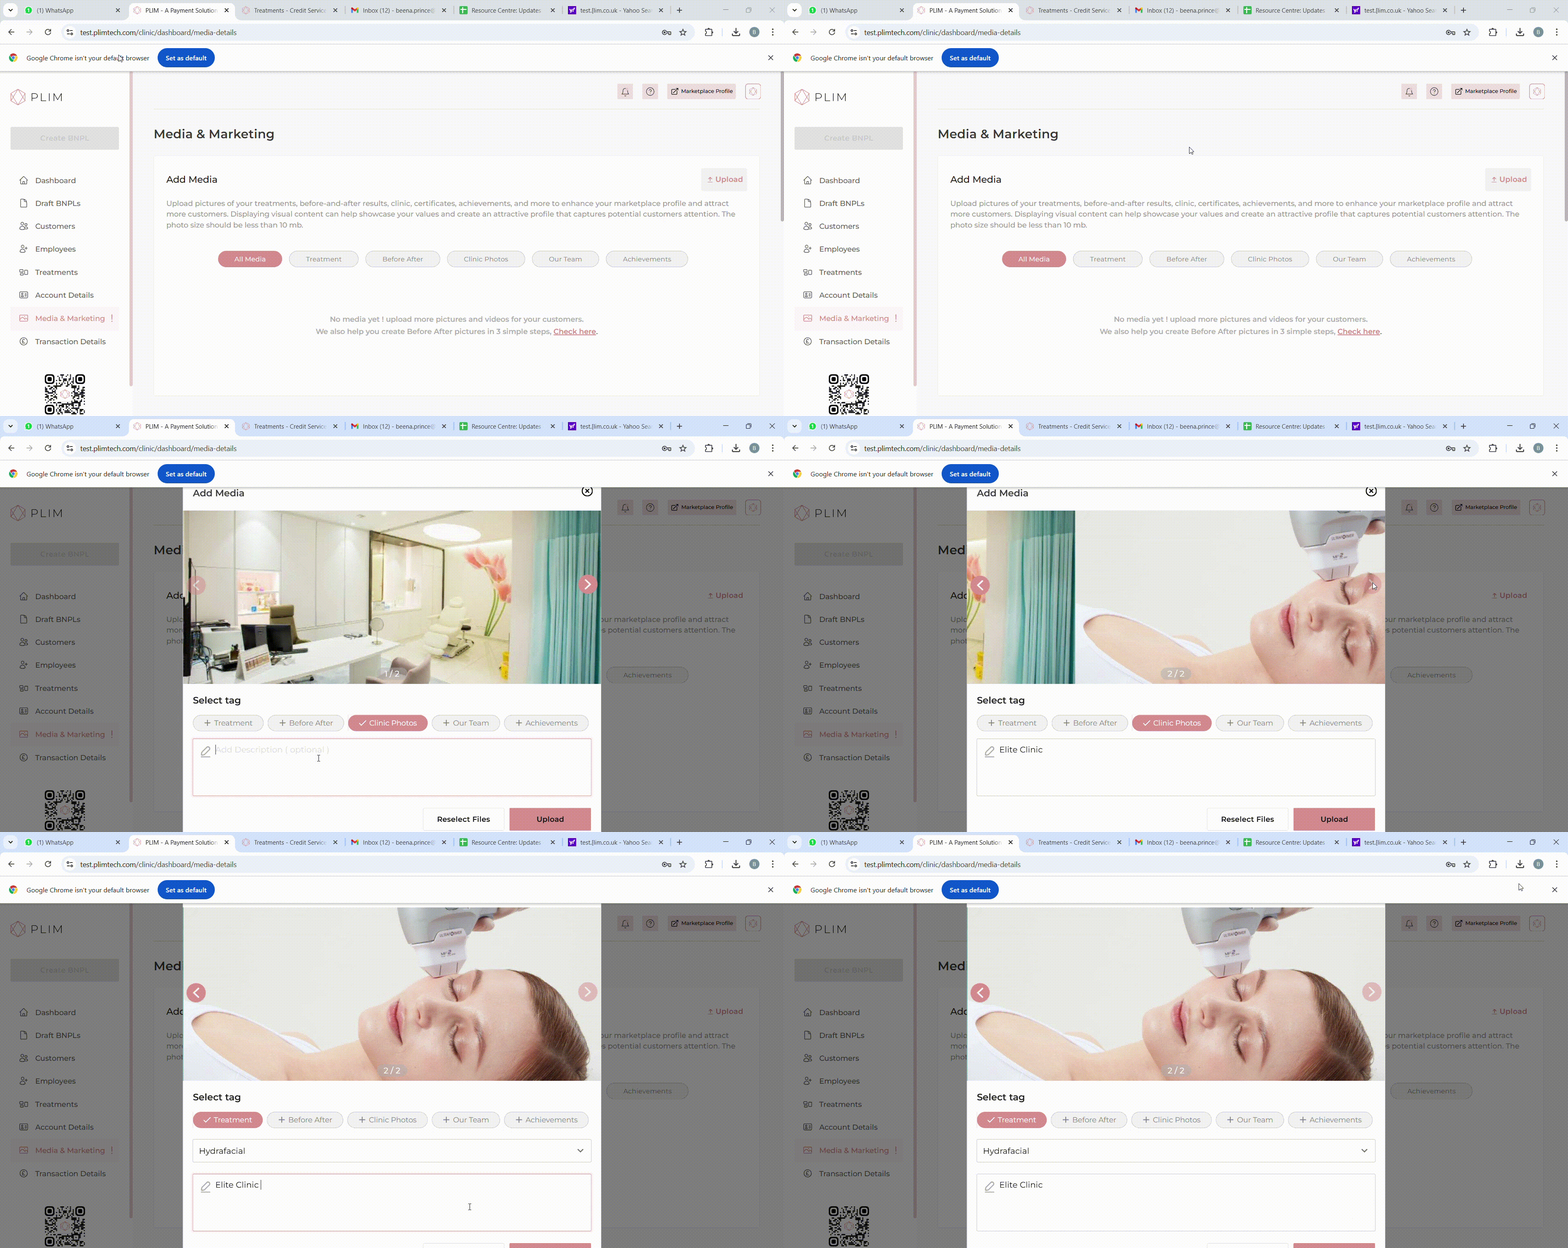
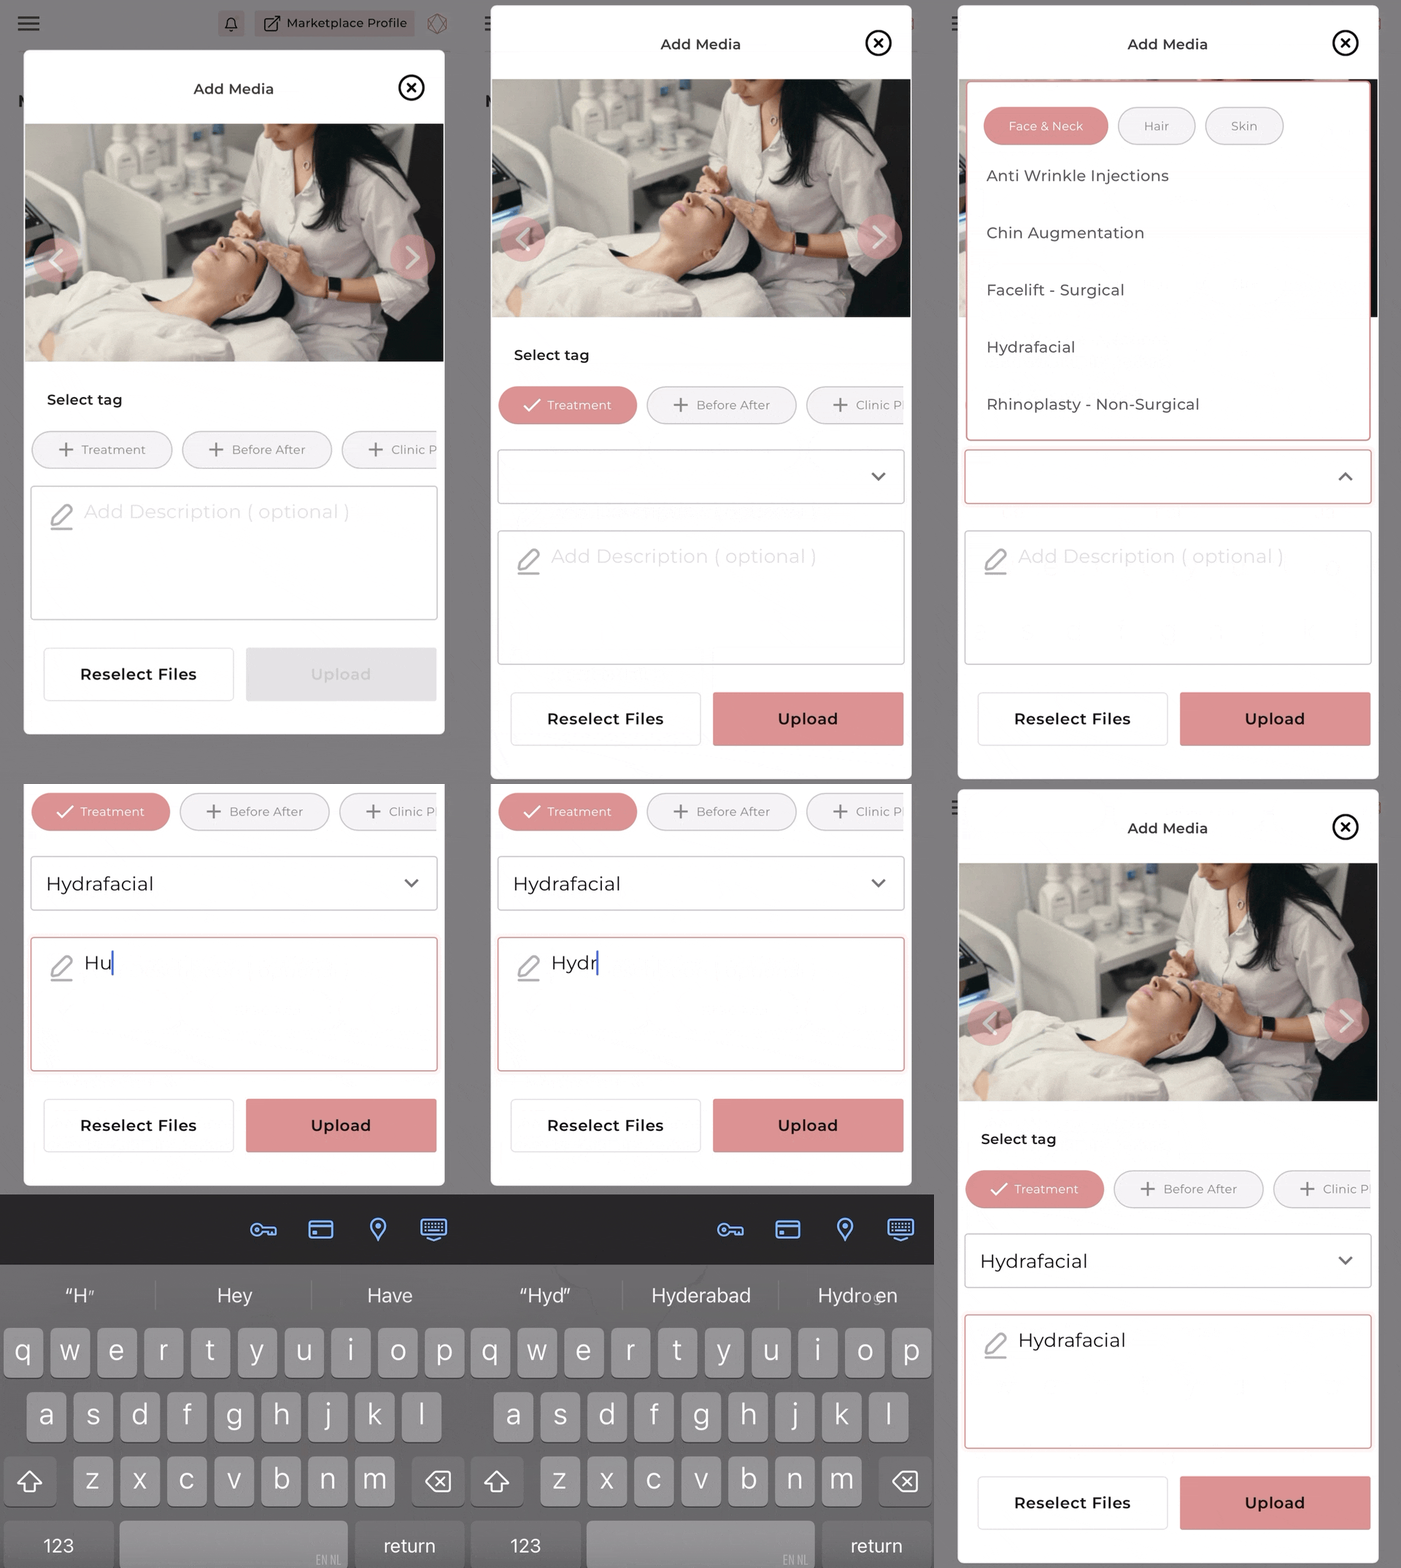
Step 3 Tag Pictures and add description (optional)
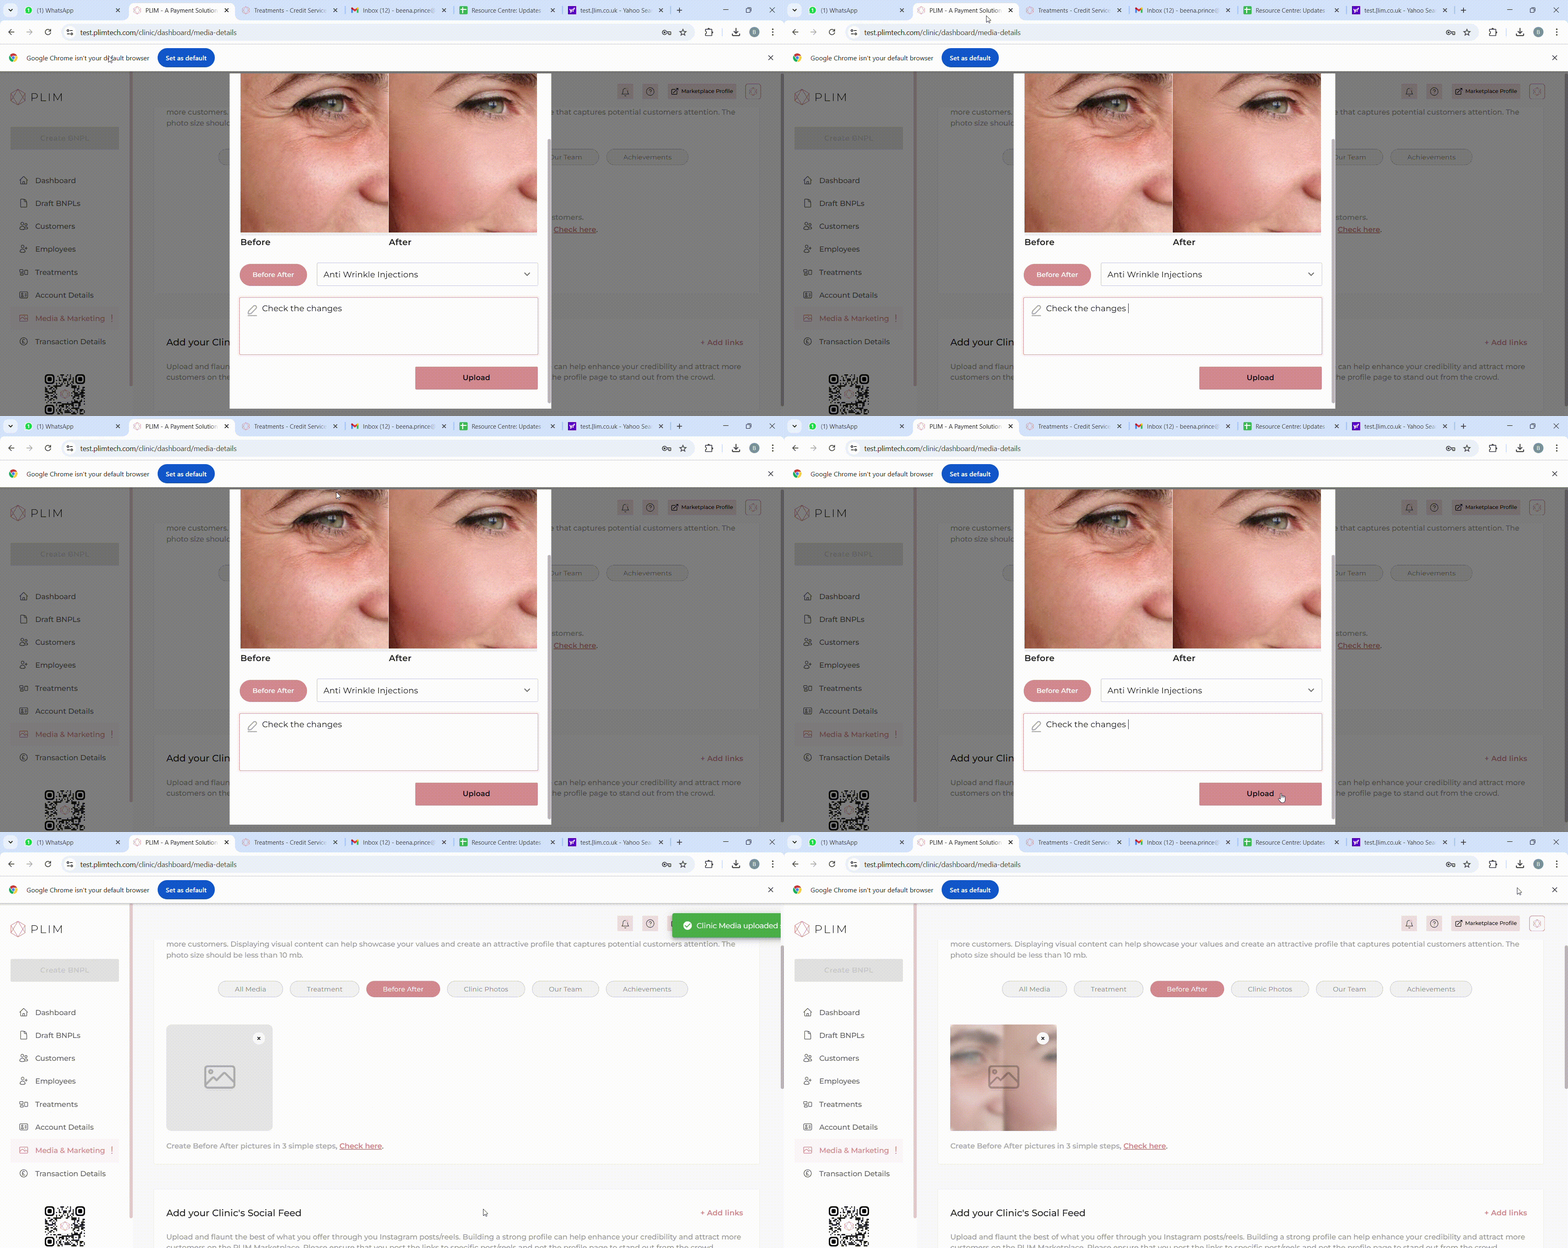
When tagging your media, choose from options like "Treatment Photos," "Before & After,", “Our team”, “Clinic Photos”, “Achievements” . For “Treatment photos” and “Before After” select the corresponding treatment name (mandatory) . Adding description is optional. This helps customers understand the content better.
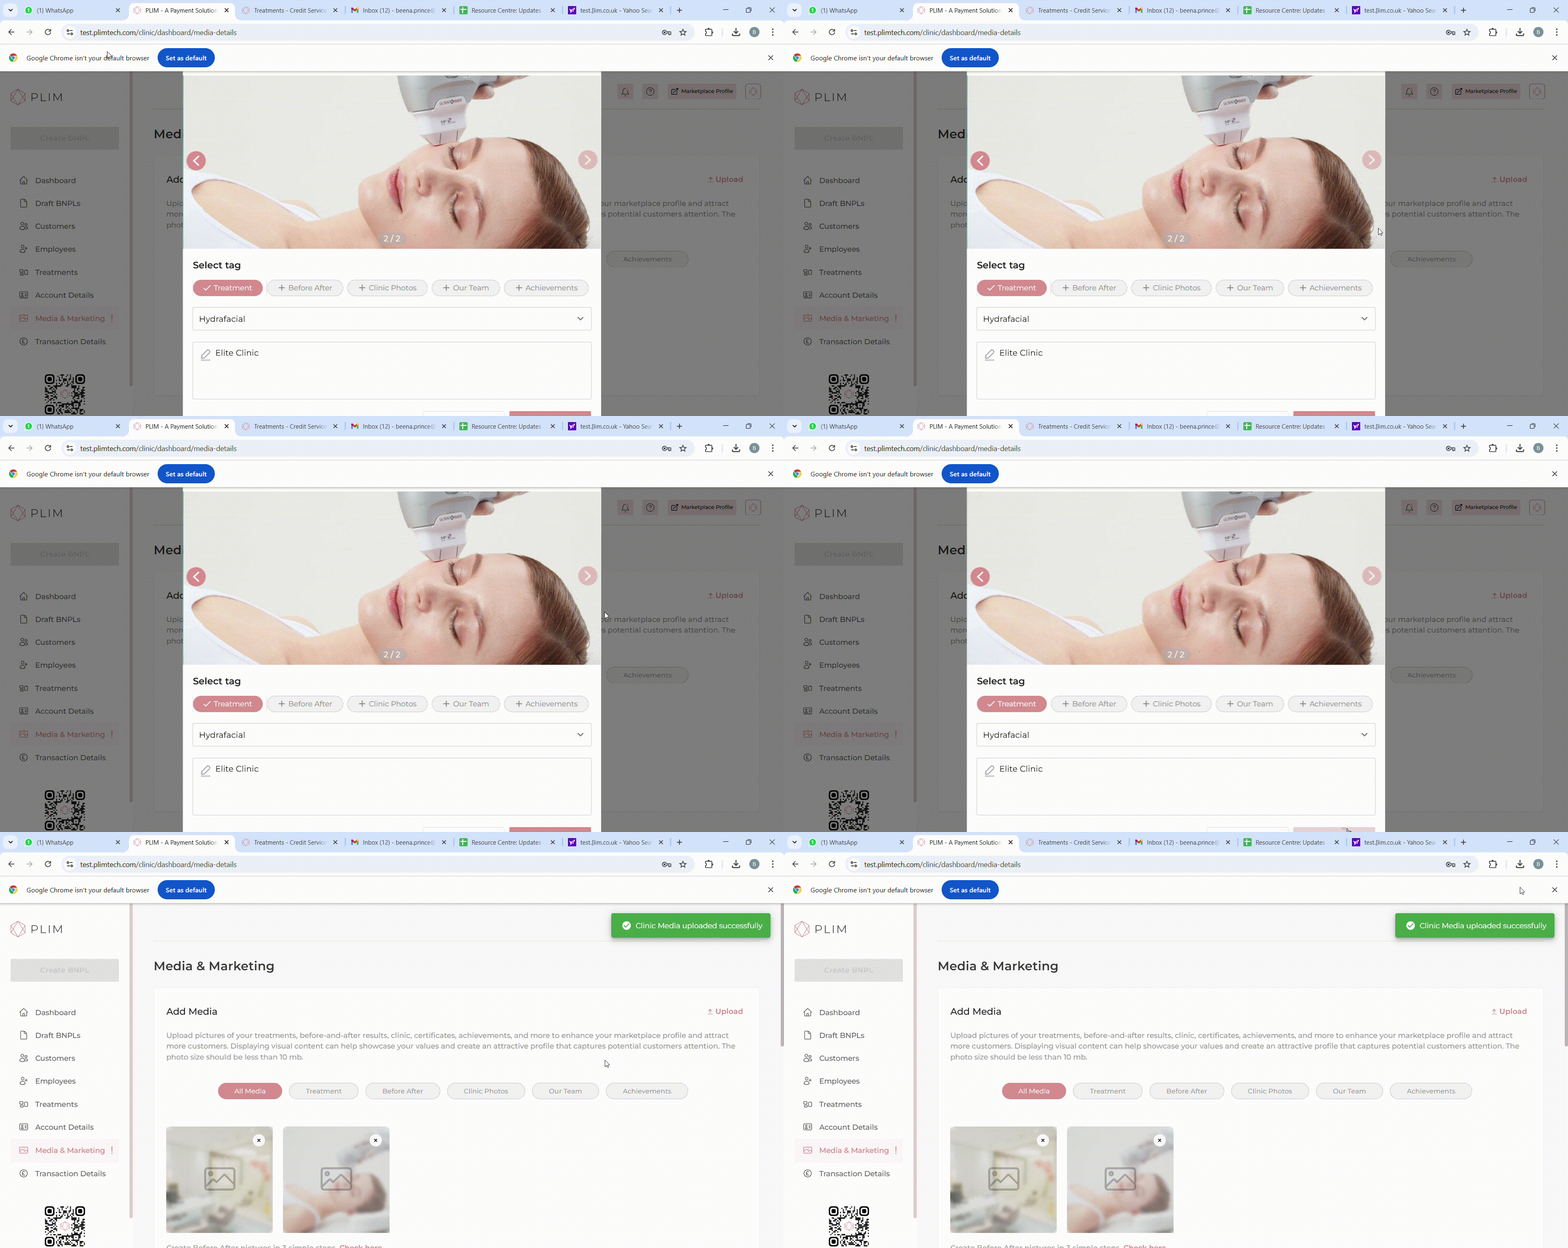
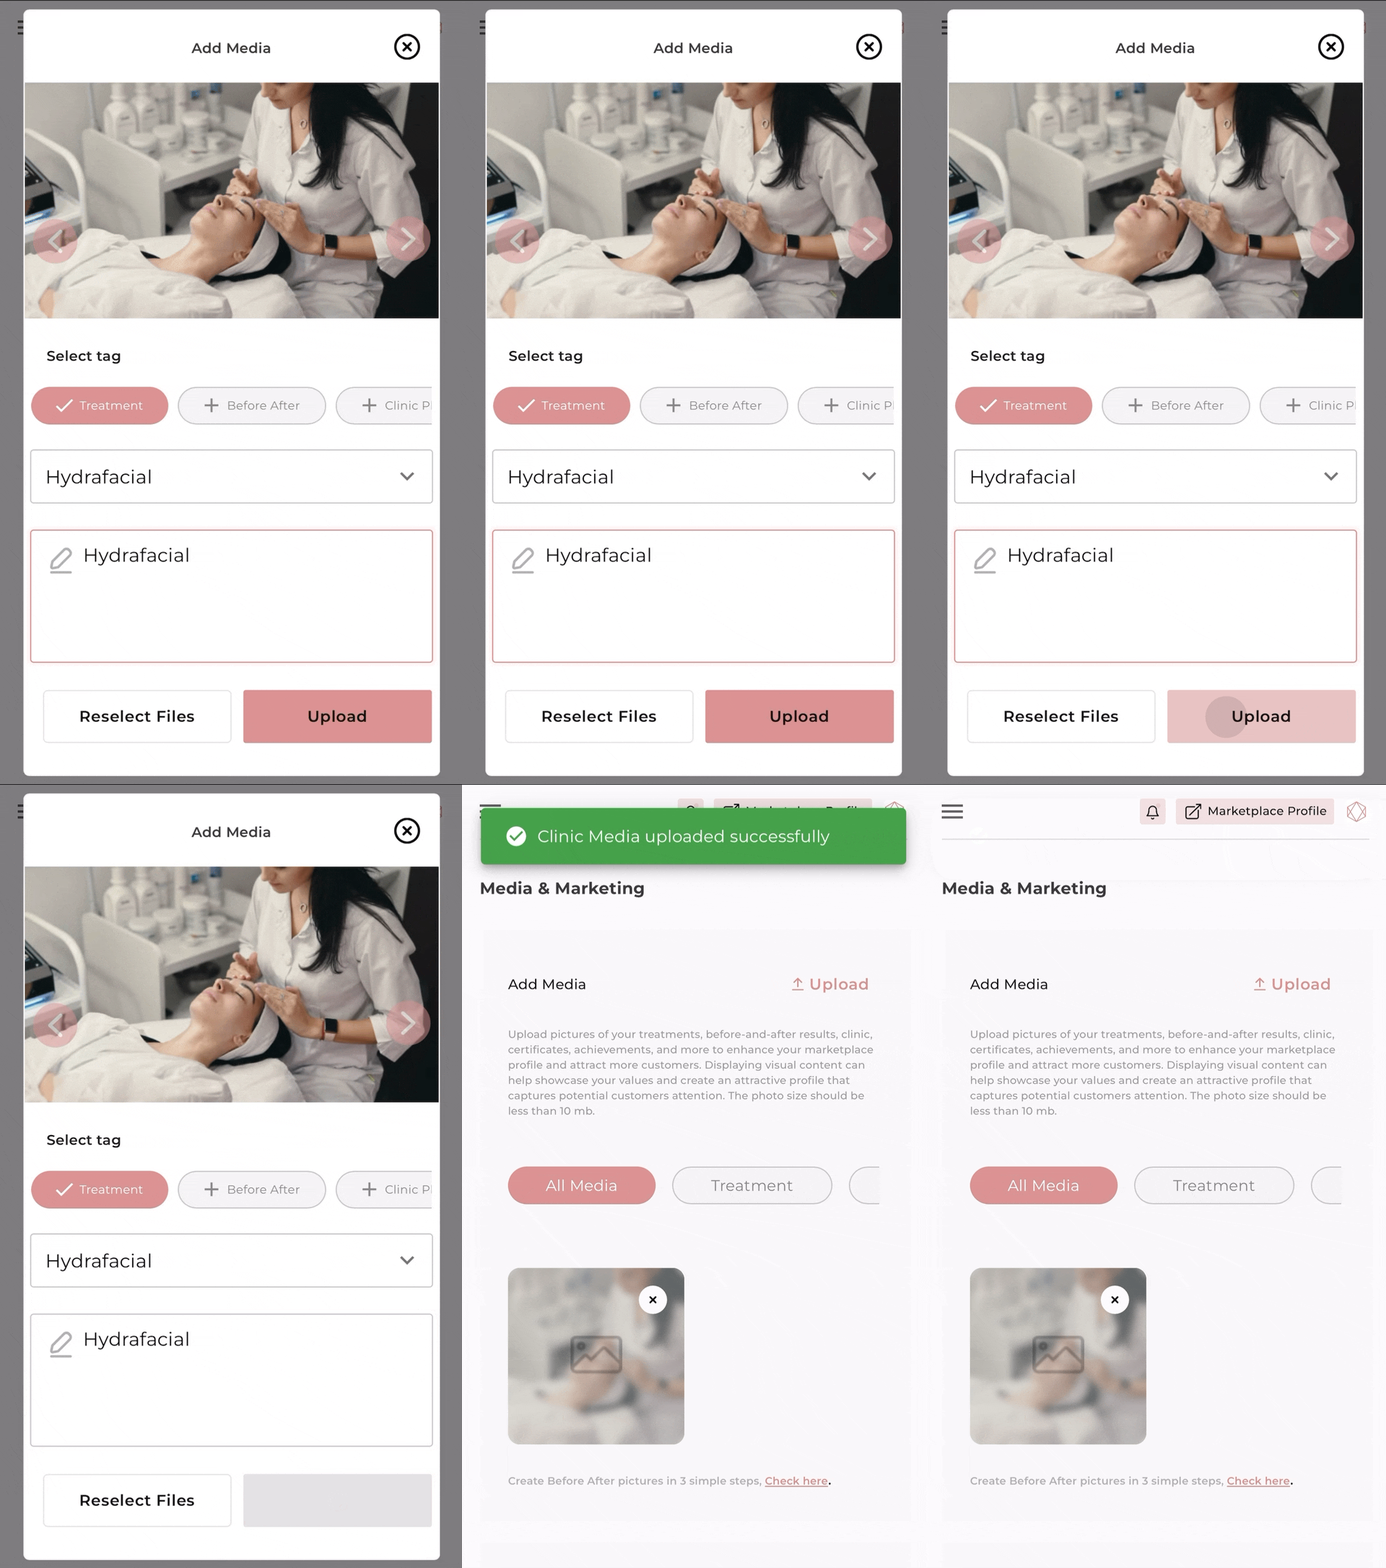
Step 4 Click on Upload
Click "Upload" after reviewing and tagging your photos. While adding a description is optional, selecting a tag is mandatory. Once uploaded, your pictures will be immediately visible on your marketplace profile.
PART B Create Before After Images
Create before / after transitions in 5 simple steps on PLIM Marketplace by uploading images and adding necessary description.
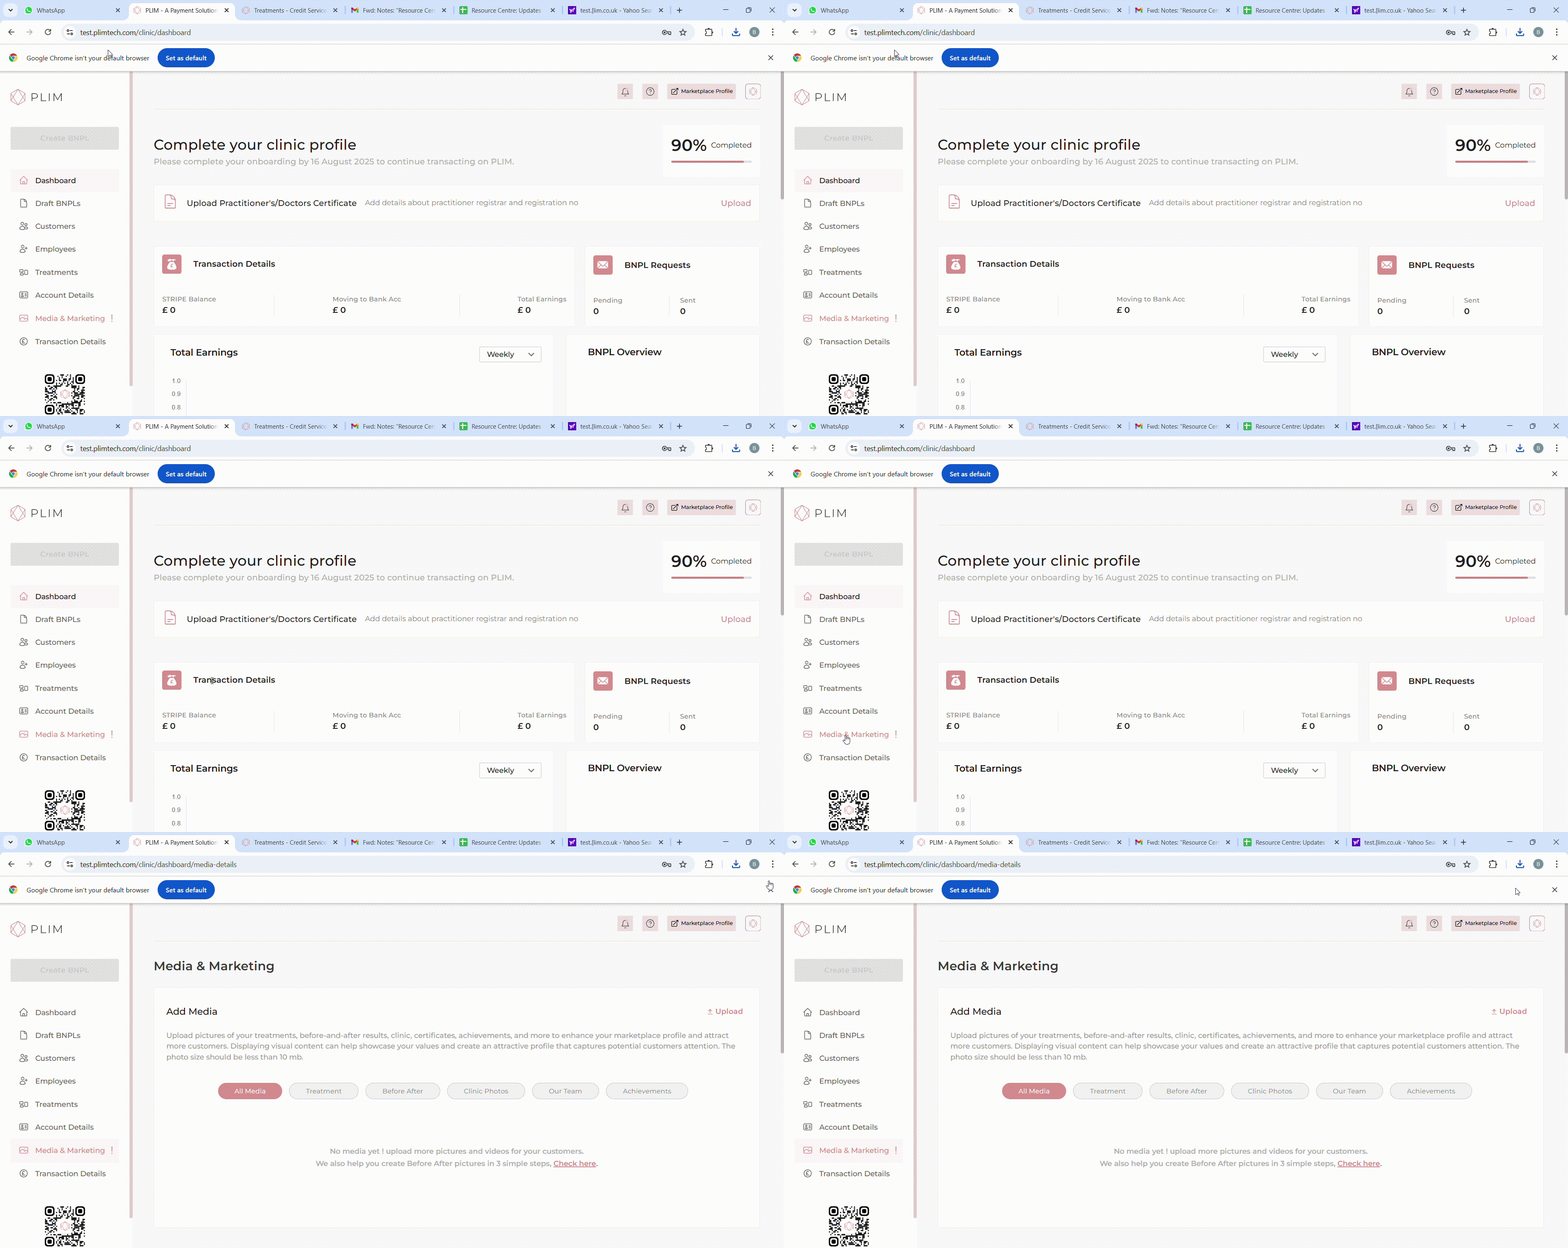
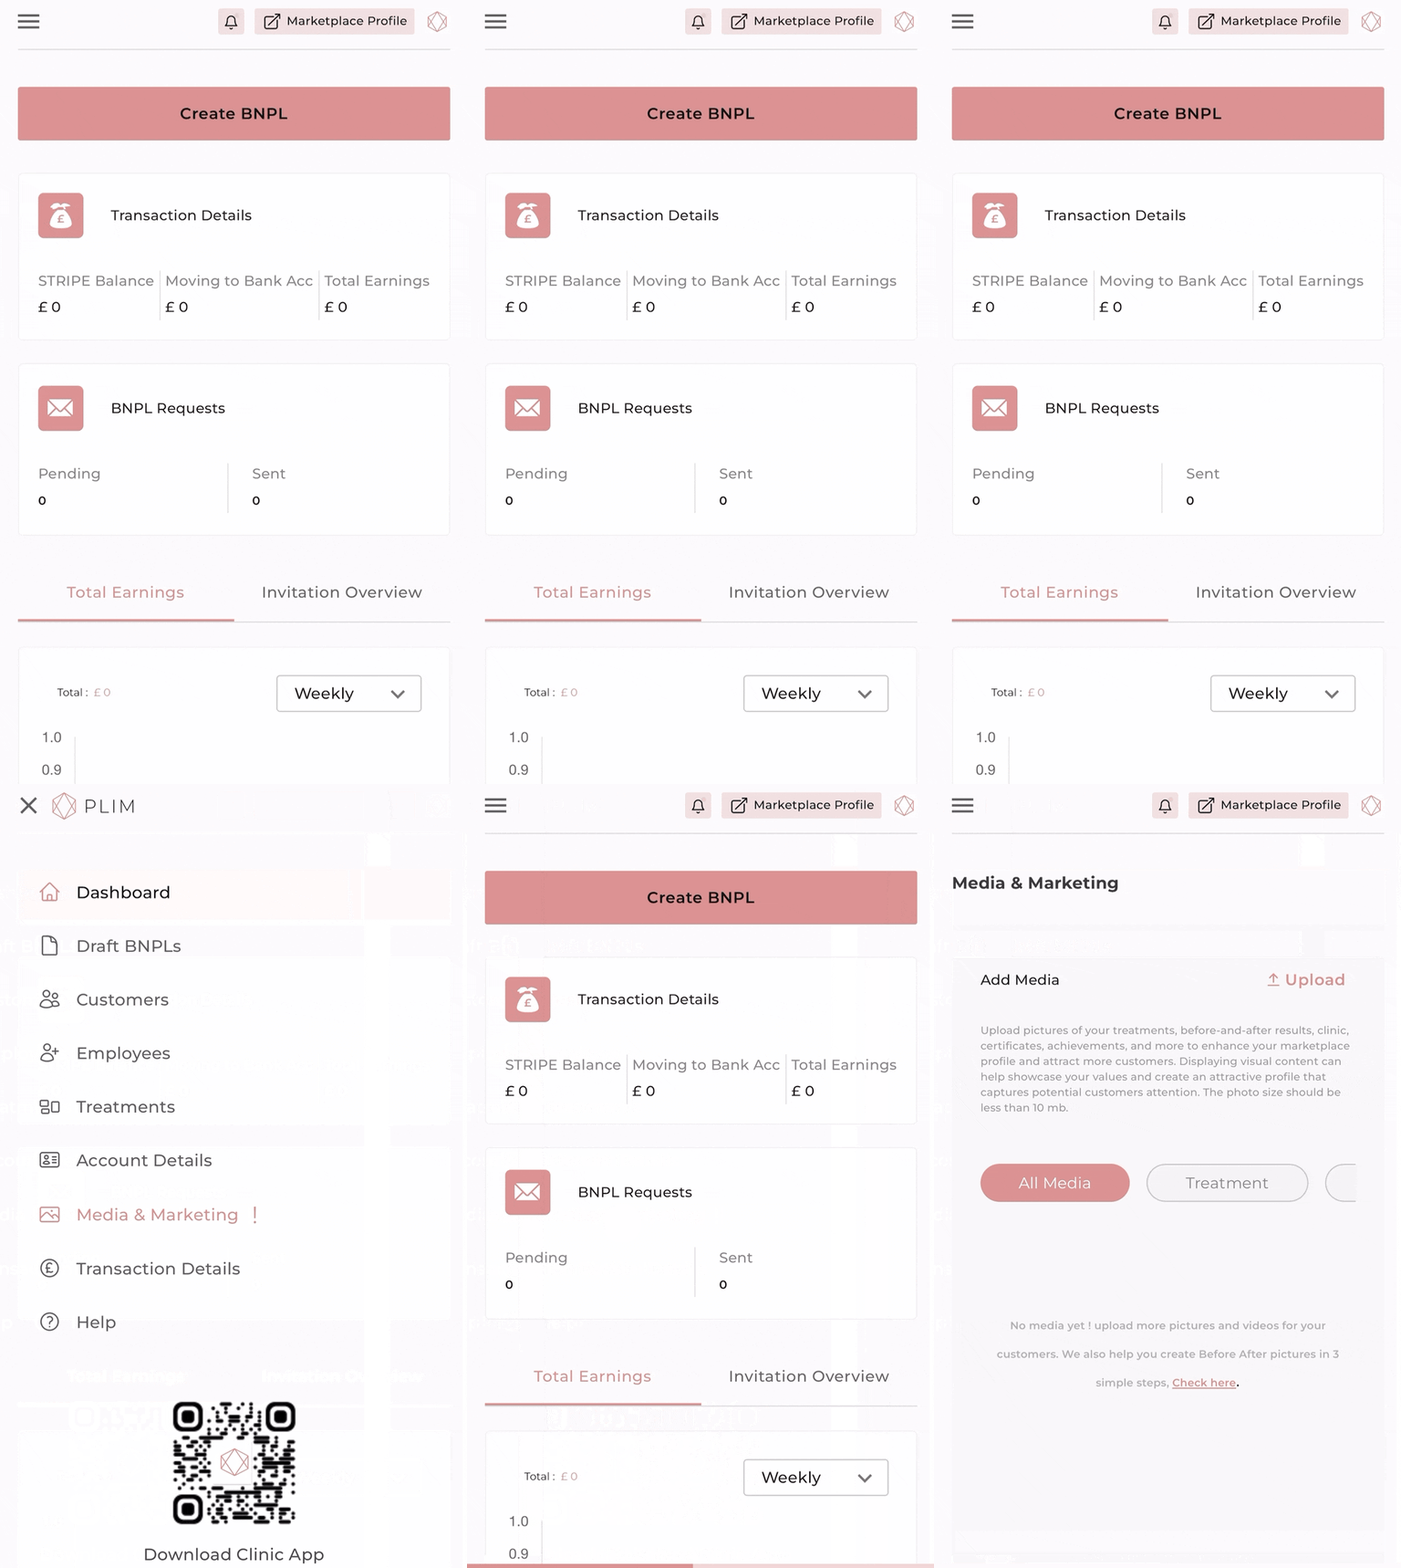
Step 1 Navigate to the media and marketing section
Begin by navigating to the Media and Marketing section of your dashboard. This section will contain all the information you can add to enhance your marketplace presence.
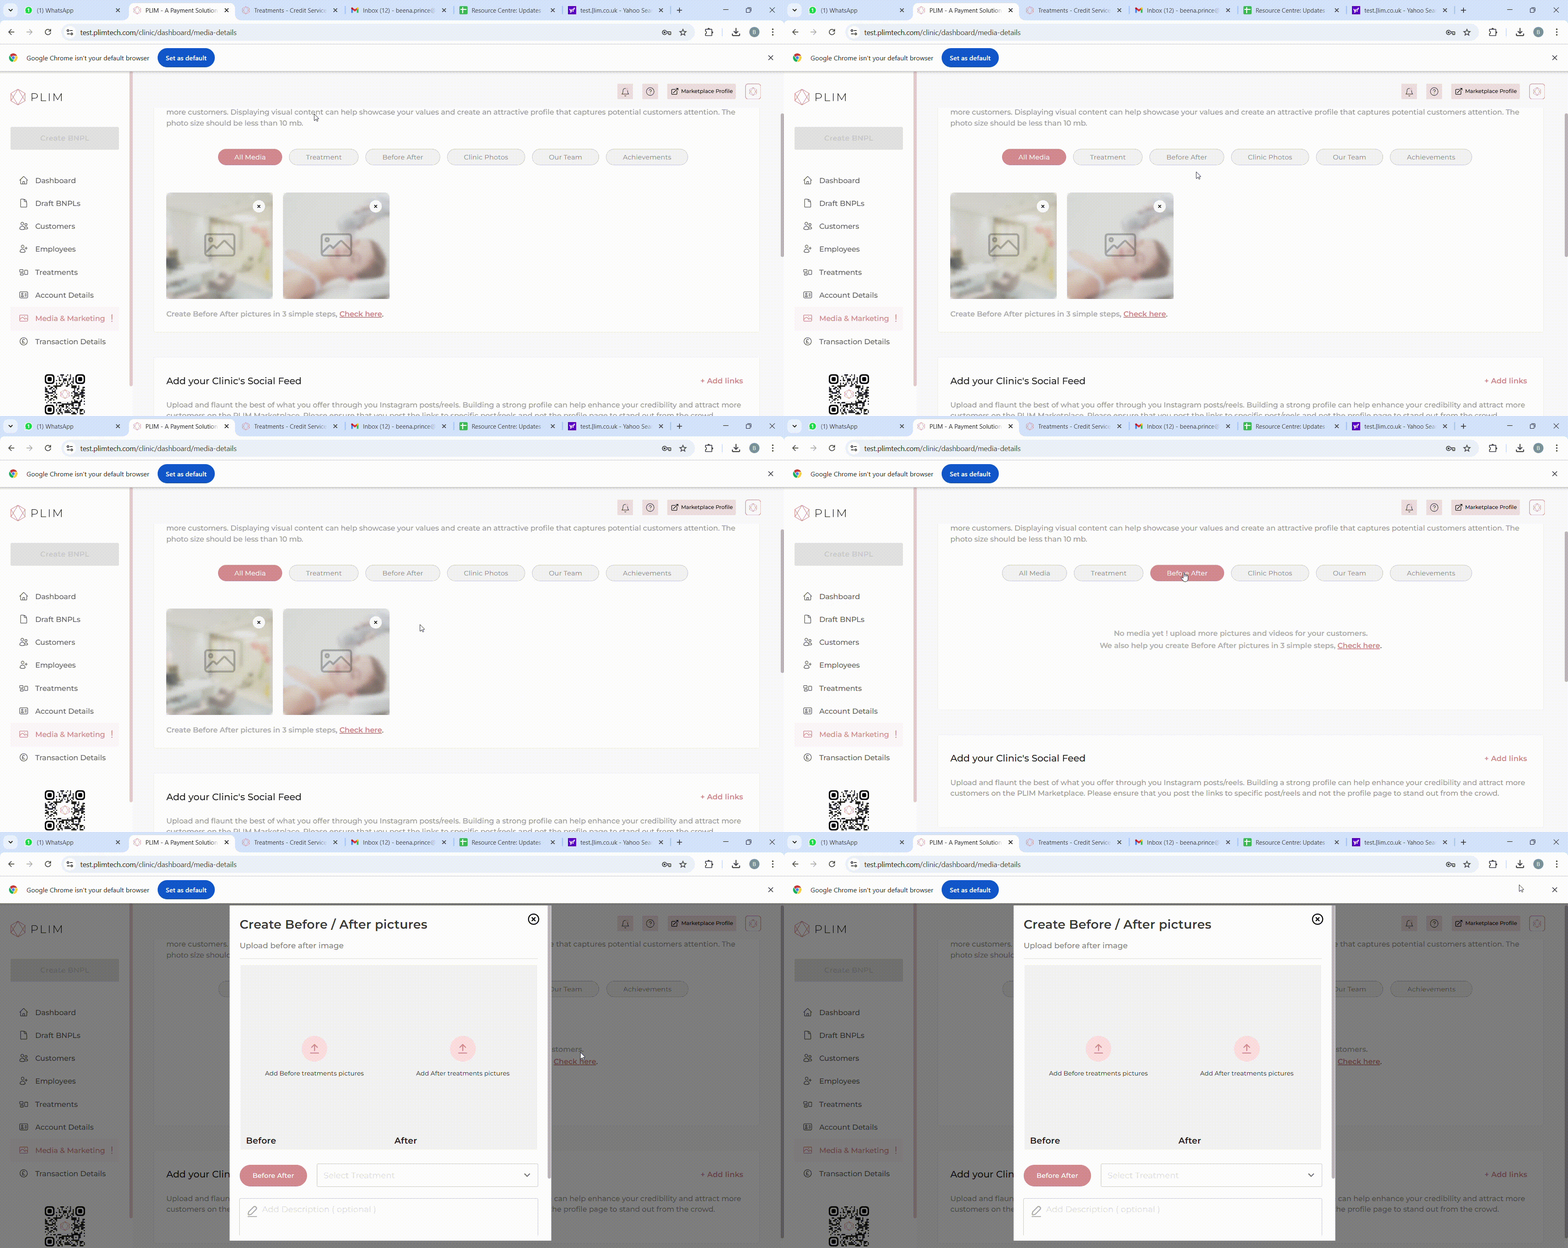
Step 2 Navigate to the before / after tab and click on "Check Here"
Navigate to the before / after tab at the bottom of the add media section, and click on check here to begin creating before/after images.
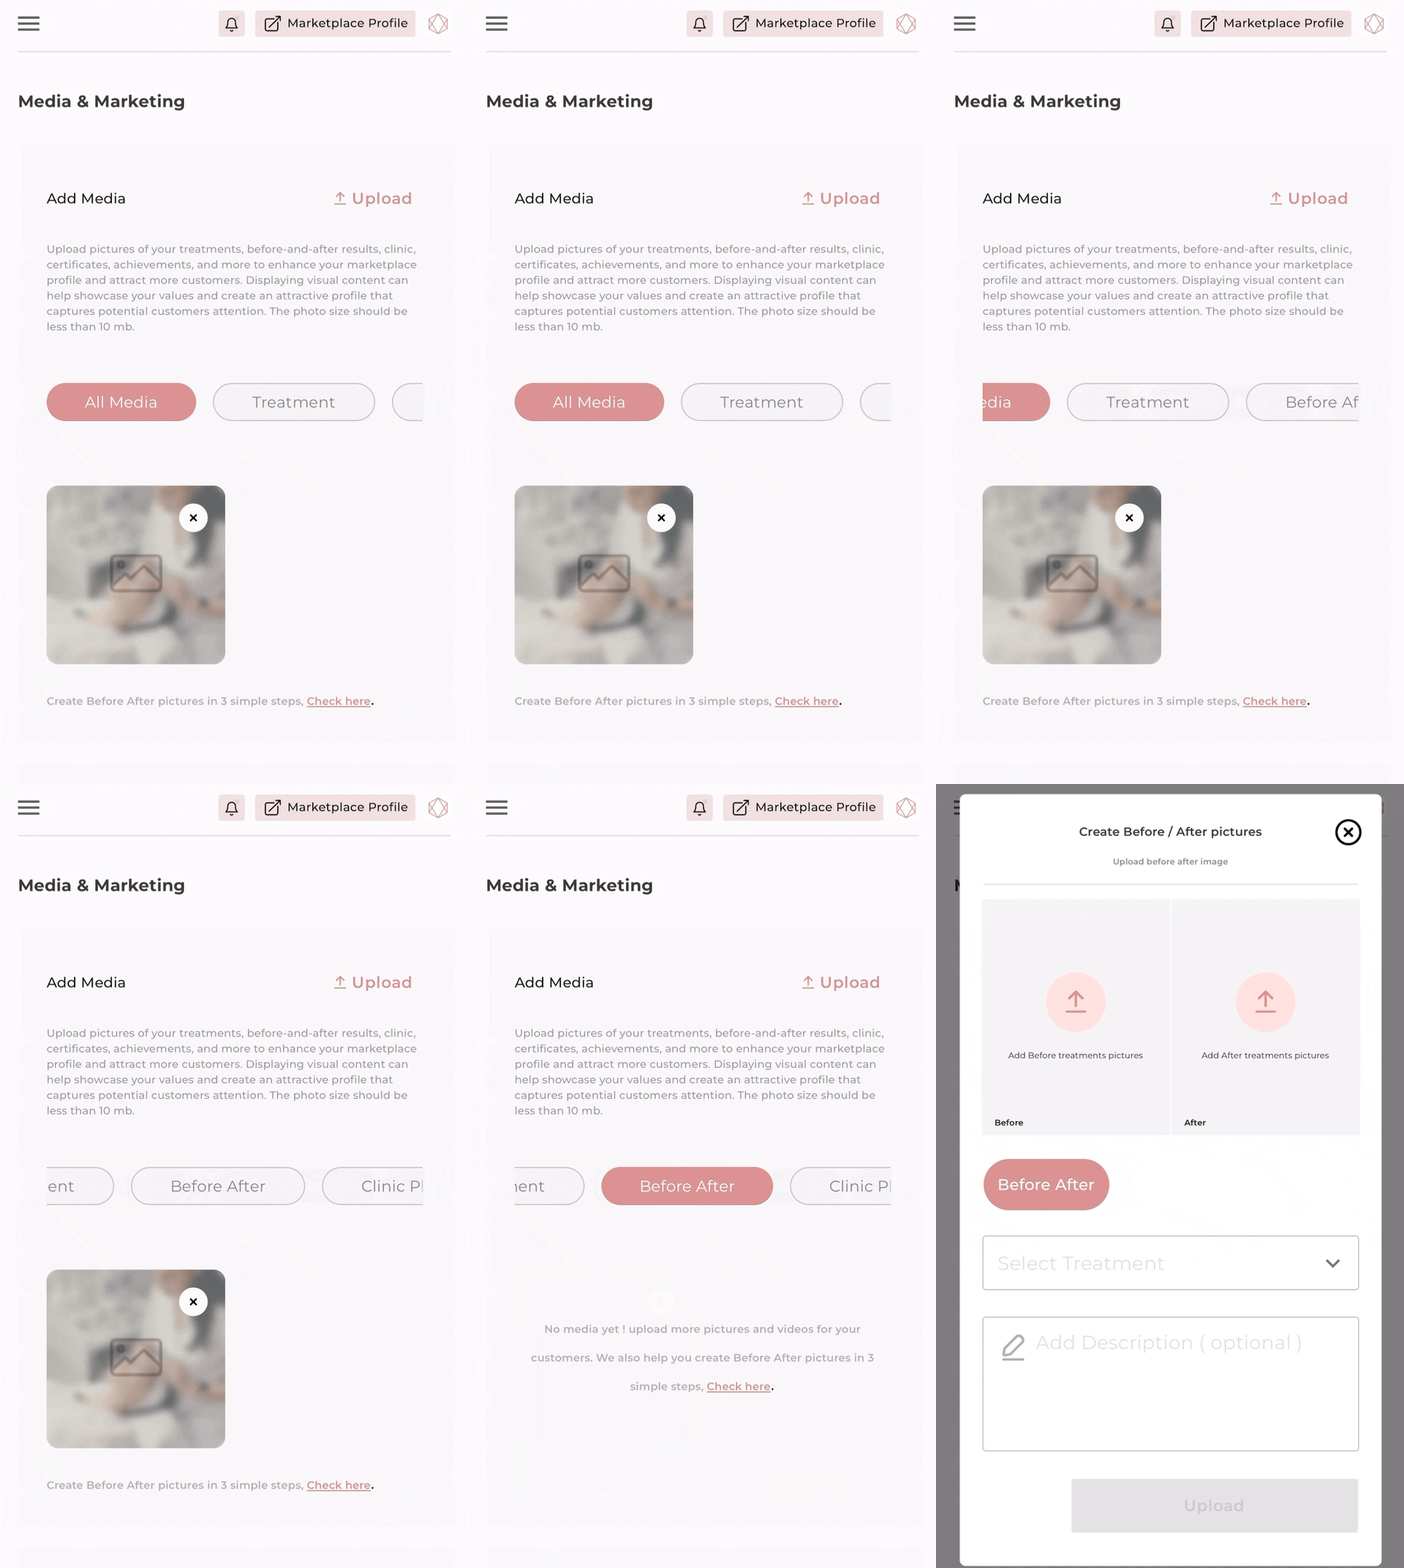
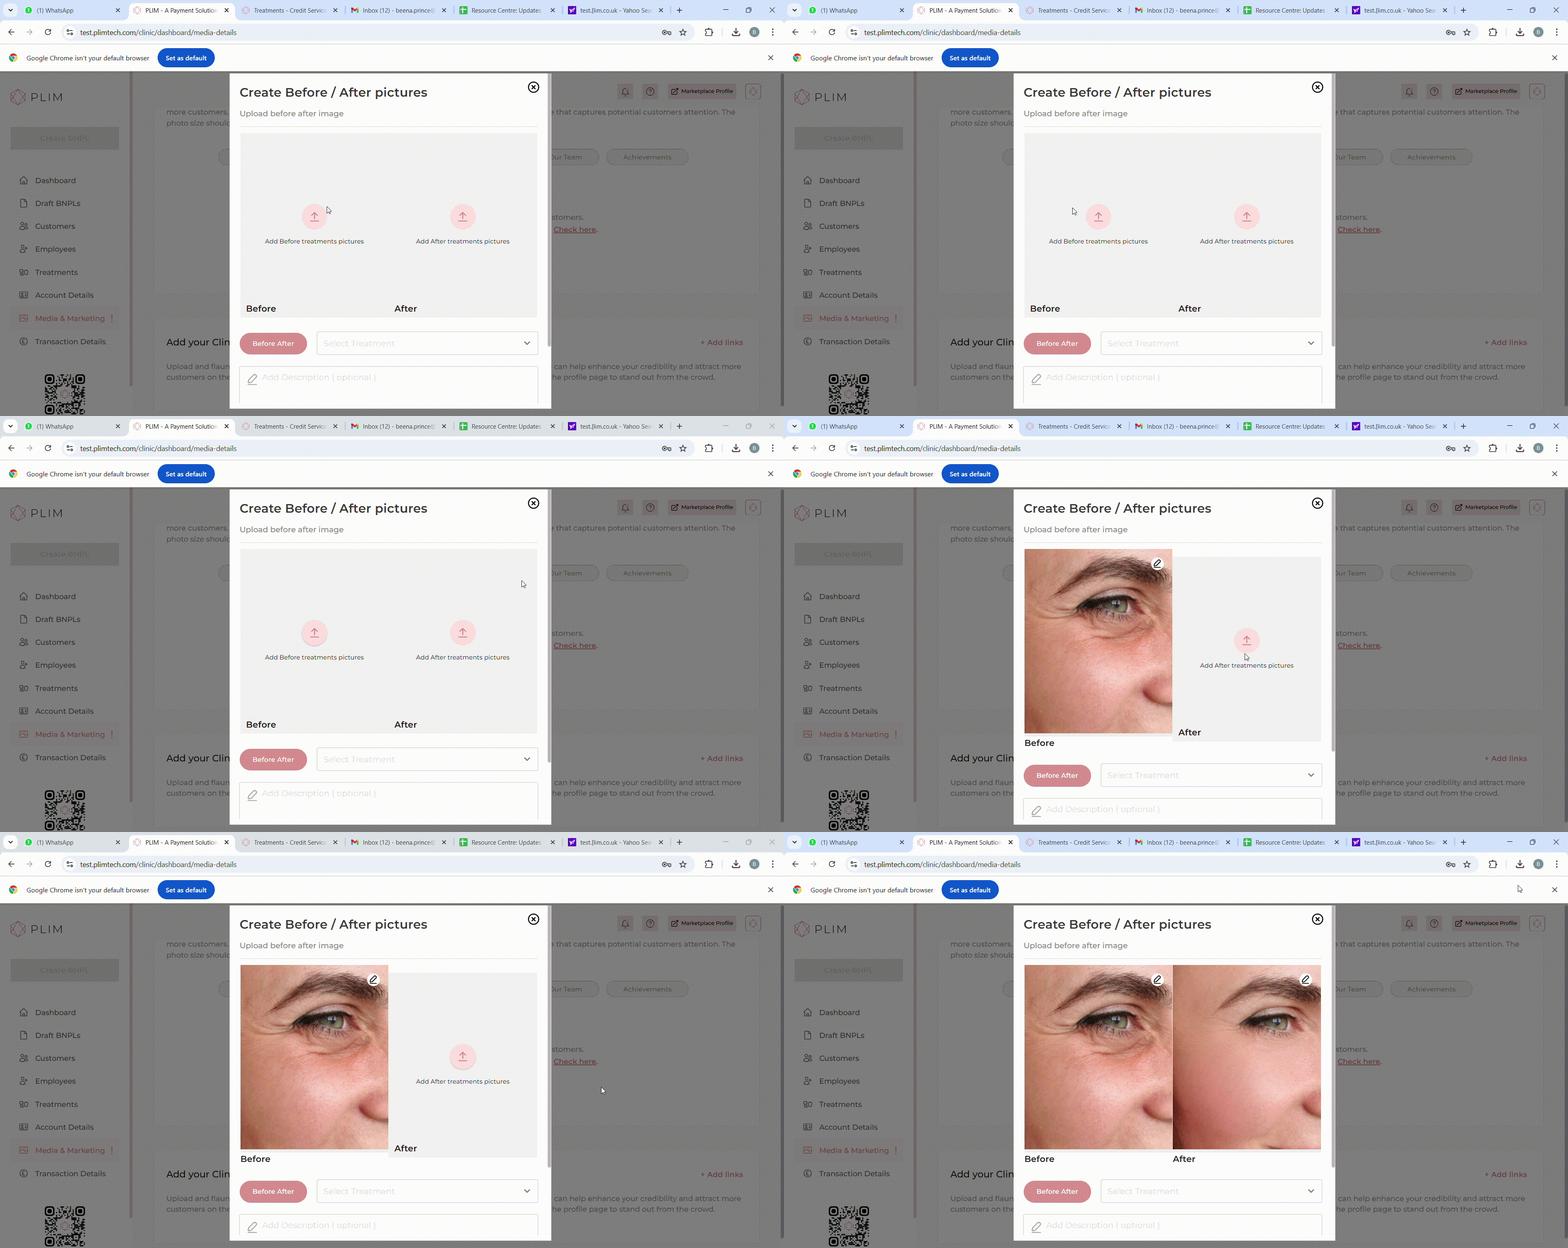
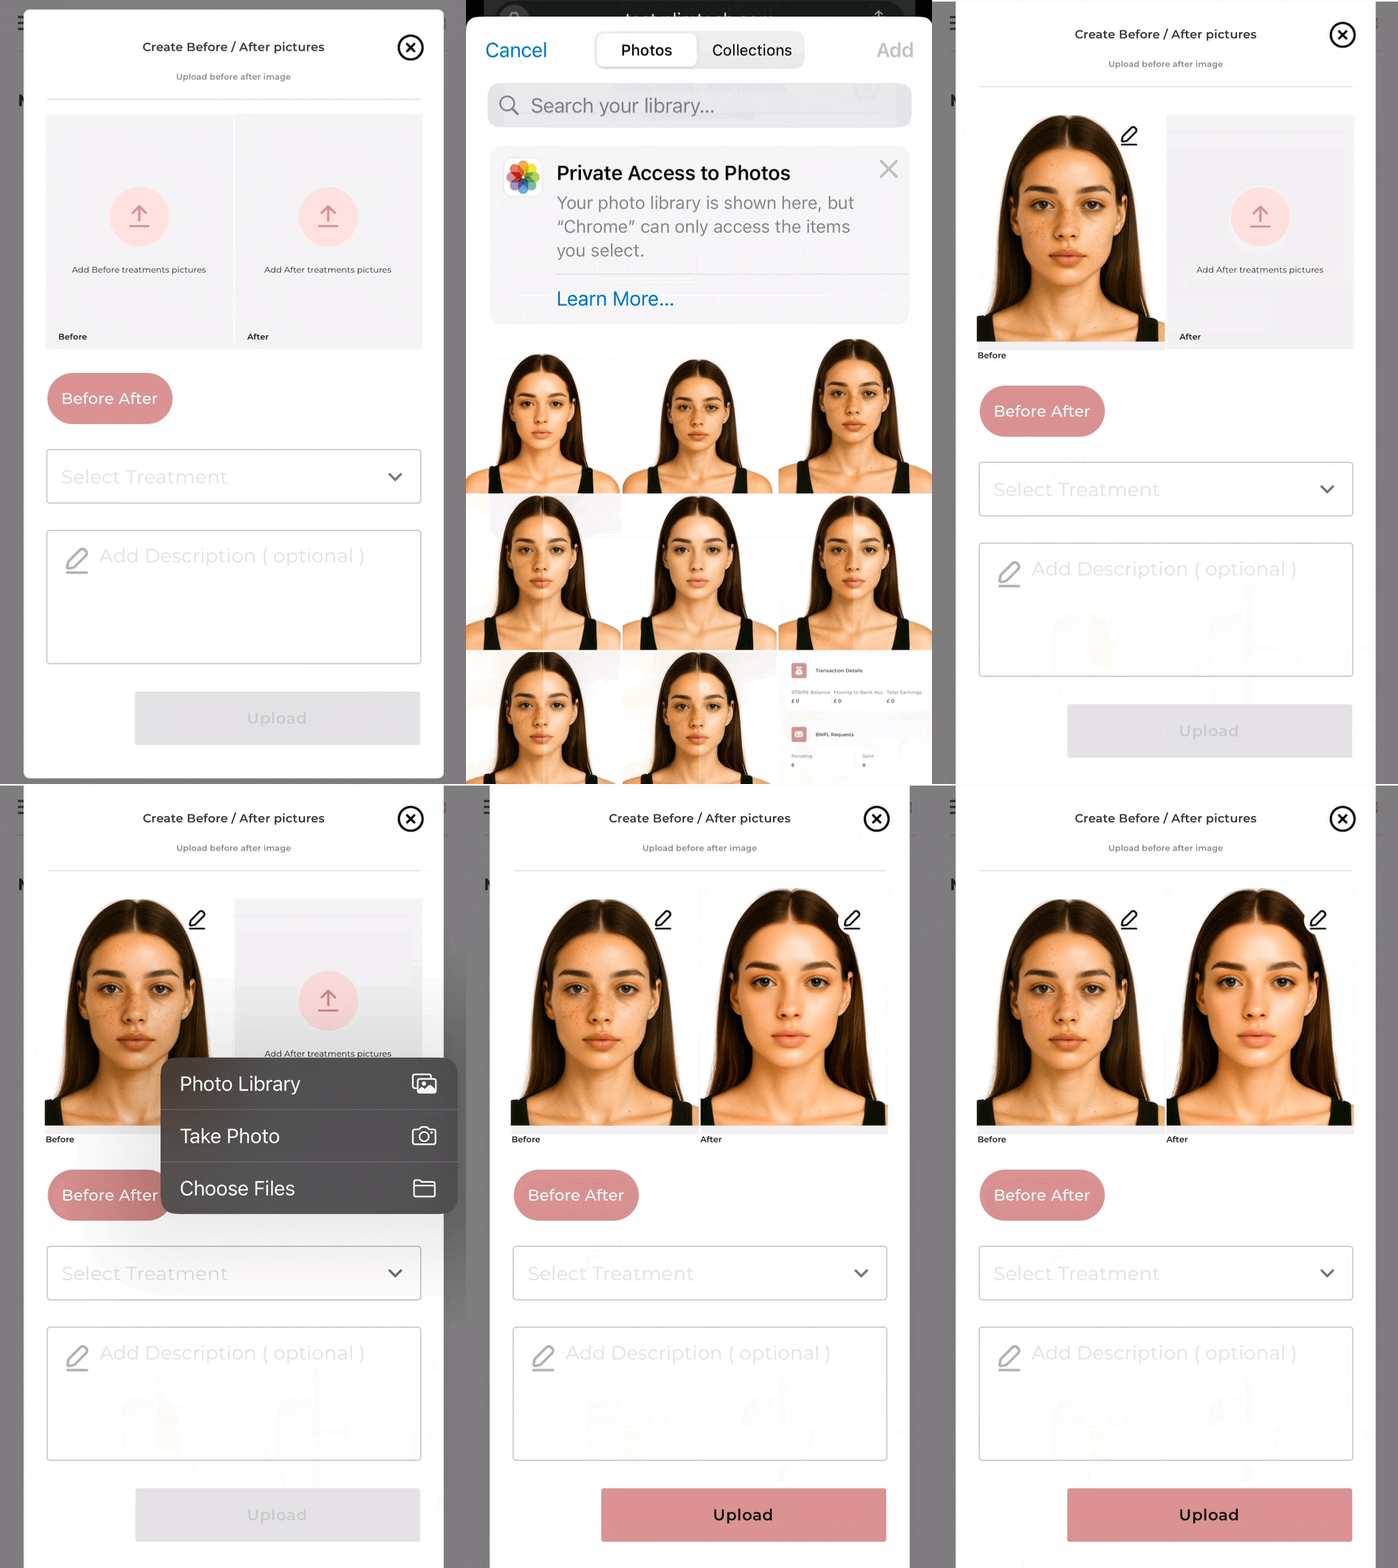
Step 3 Add before and after treatment images
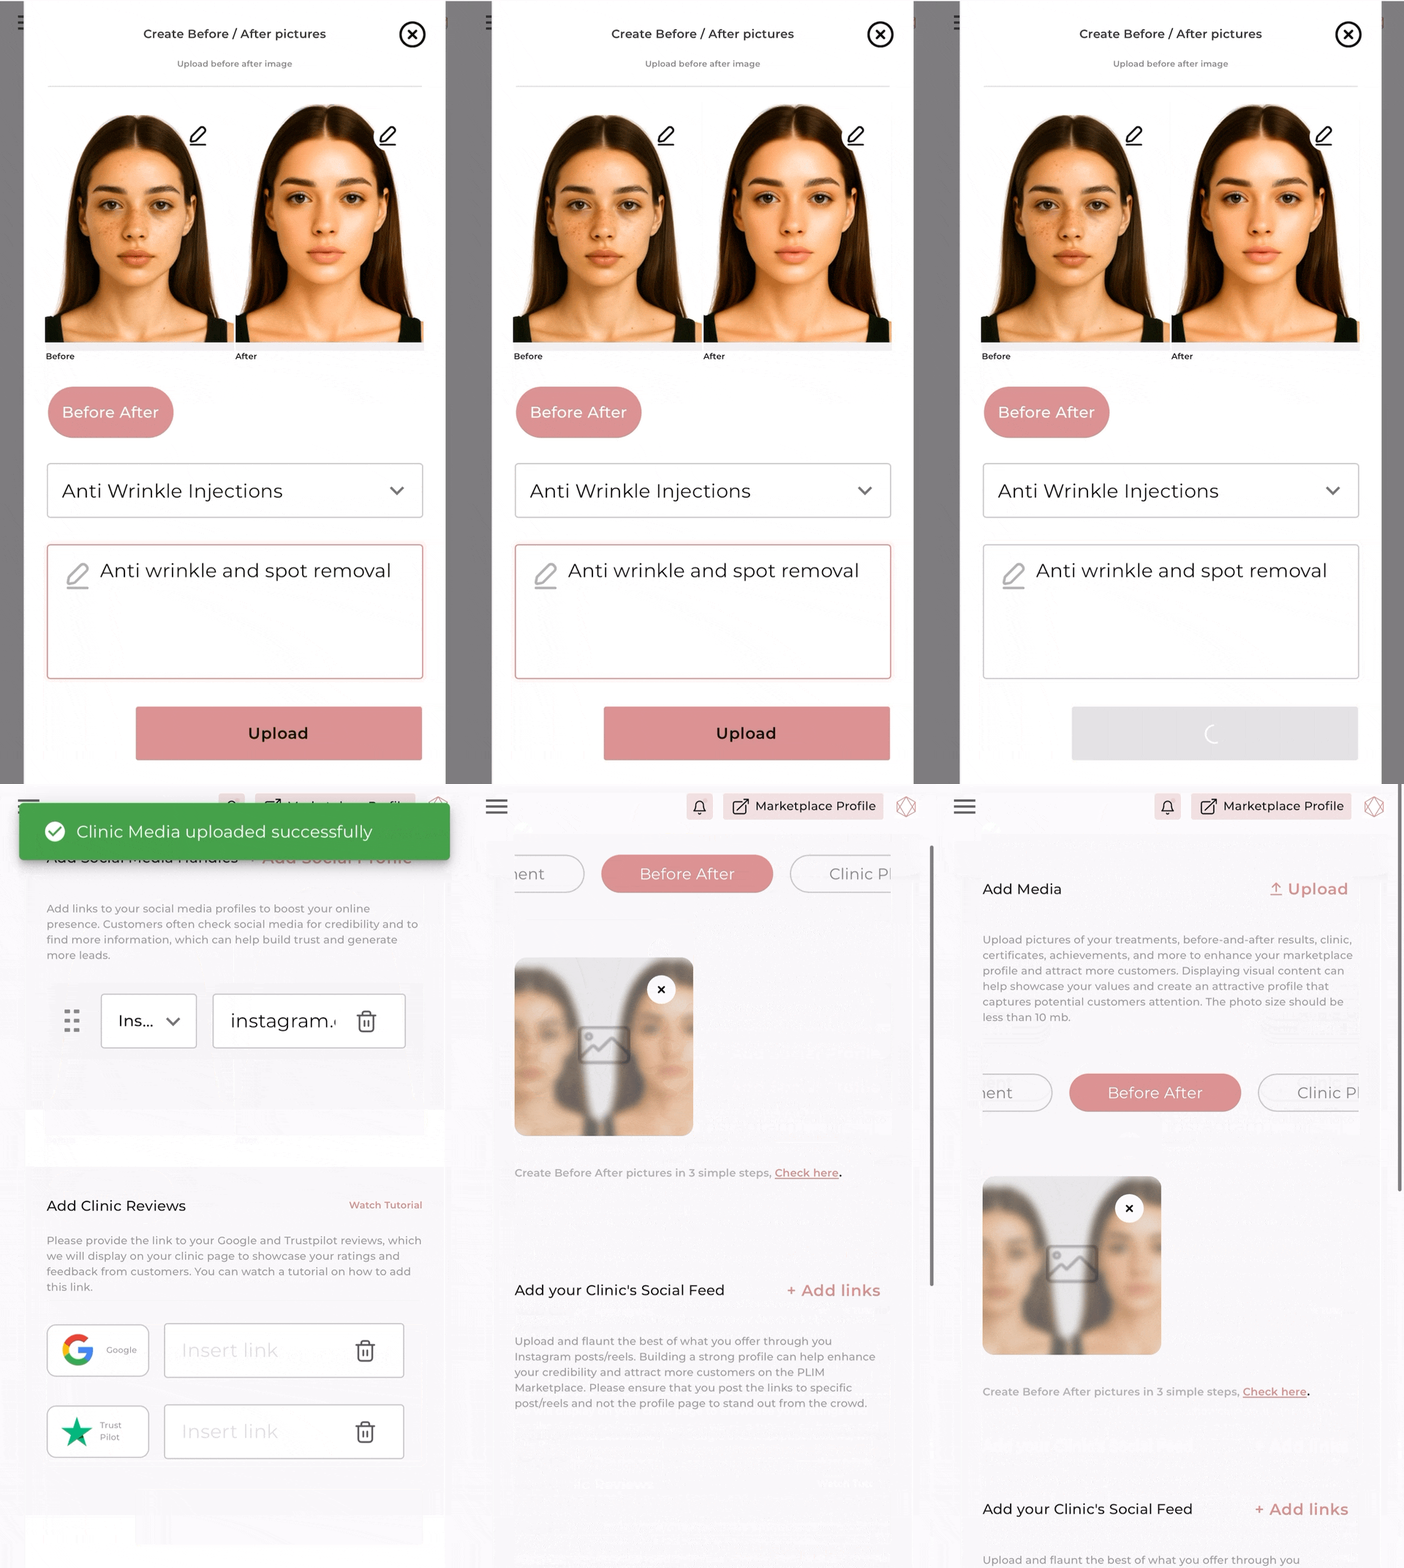
A pop-up browser will appear, allowing you to add your before and after treatment images. Please make sure that the images are in JPEG format photos (up to 2MB each). Click "Continue" and review the images uploaded.
Step 4 Tag Pictures and add description (optional)
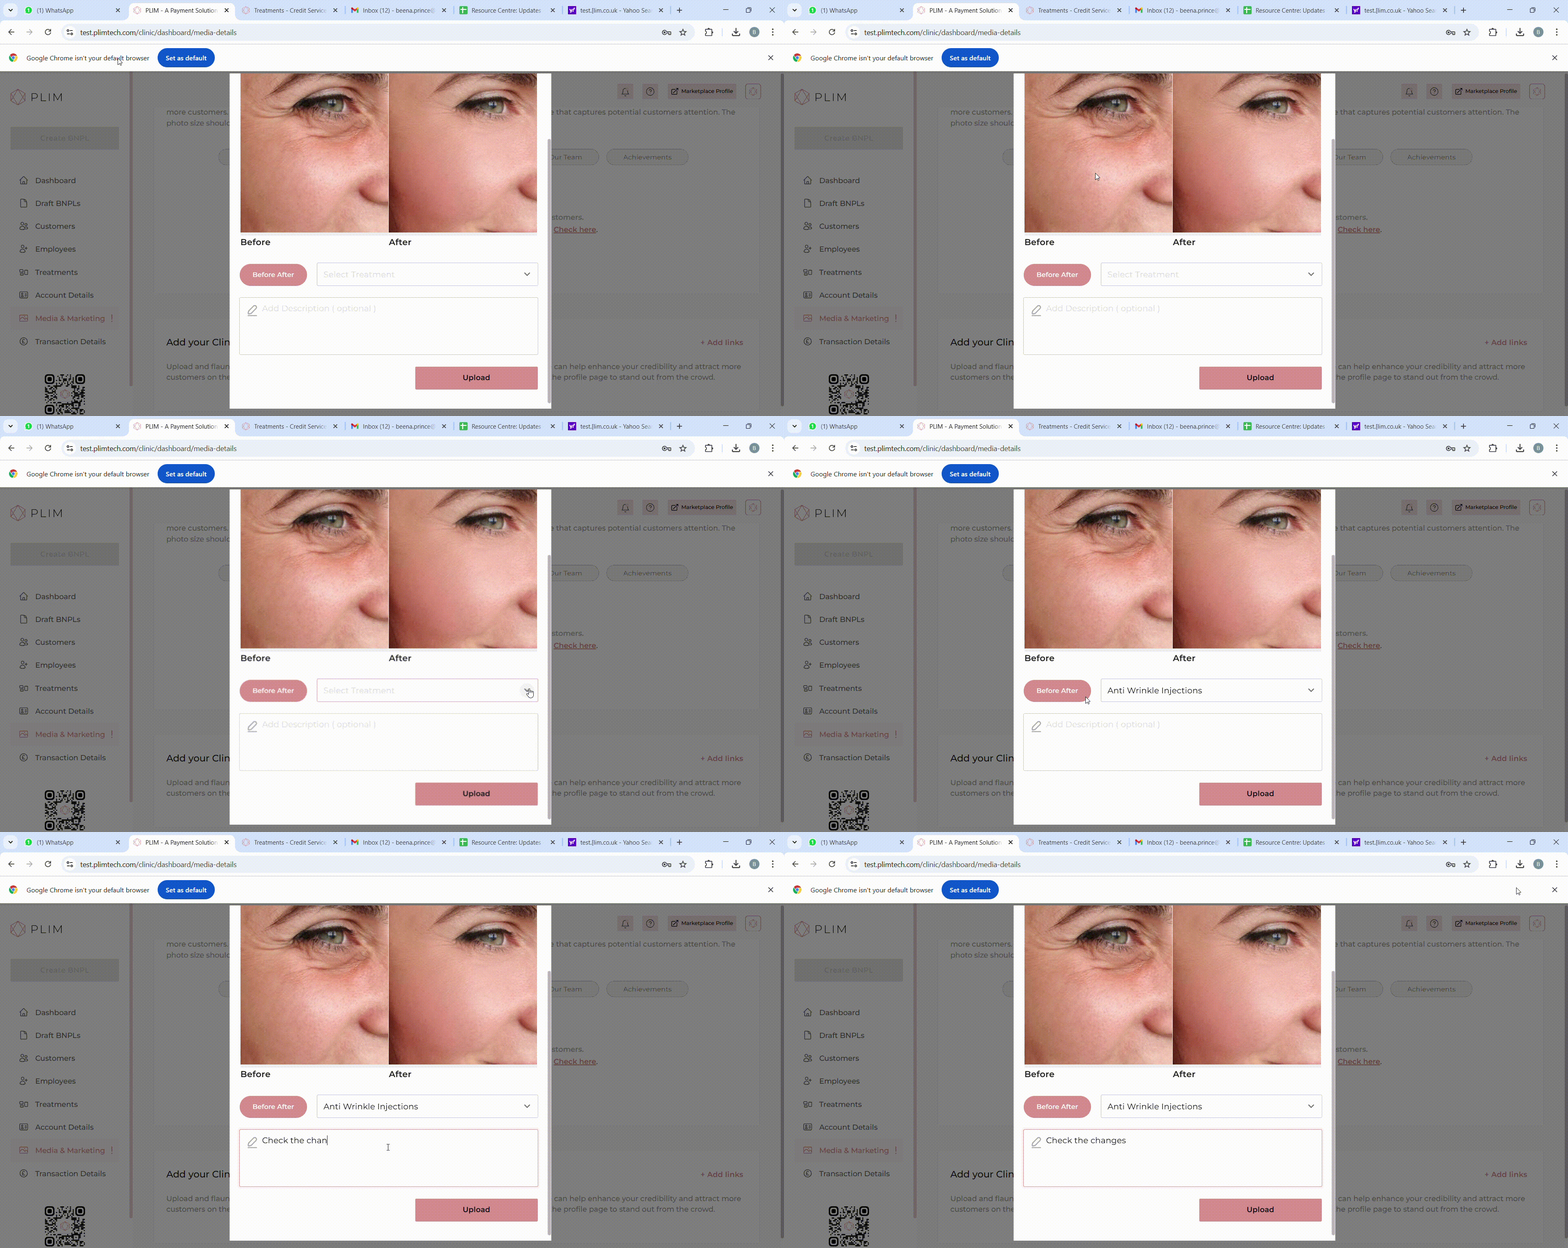
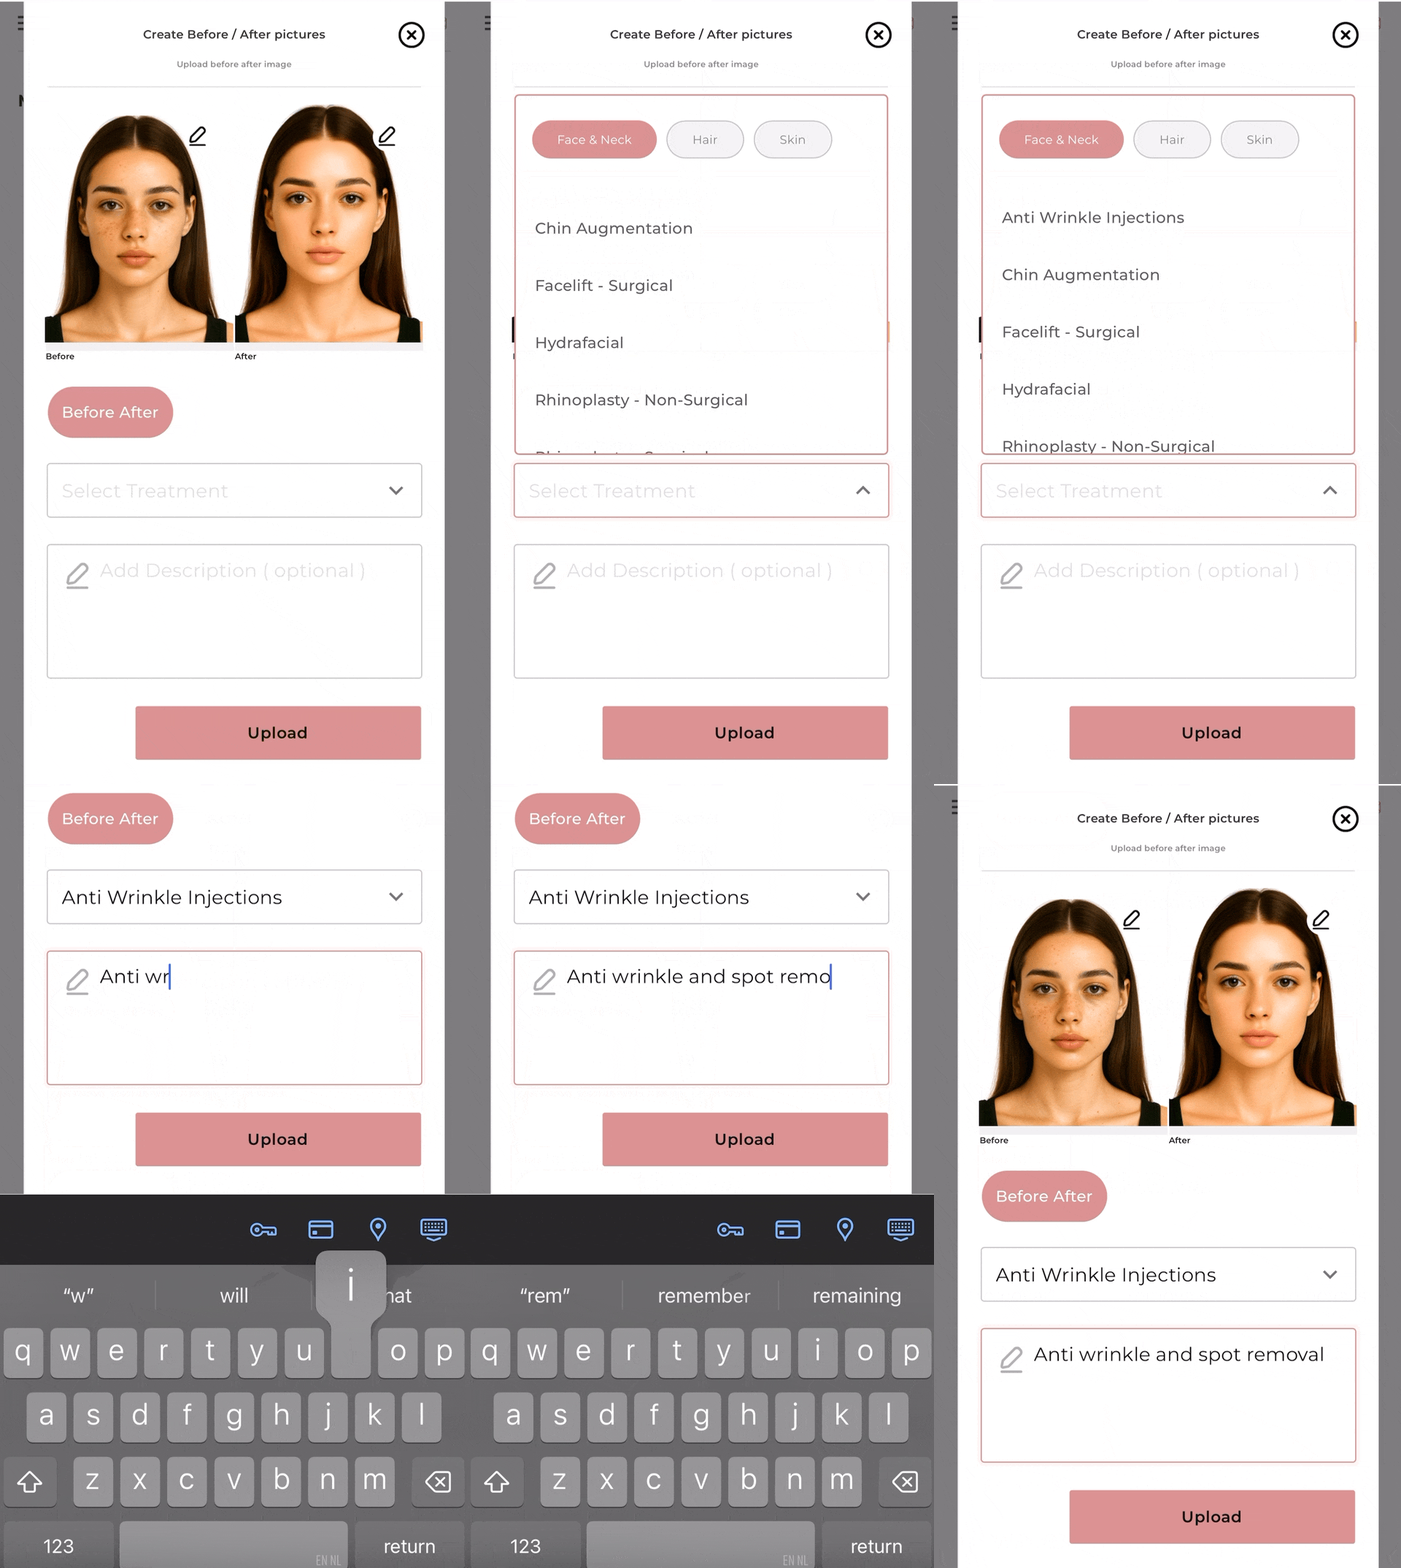
When tagging your media, choose Before & After from options listed. Select the corresponding treatment name (mandatory) . Adding description is optional. This helps customers understand the content better.
Step 5 Click on Upload
Click "Upload" after reviewing and tagging your photos. While adding a description is optional, selecting a tag is mandatory. Once uploaded, your pictures will be immediately visible on your marketplace profile.
Was it helpful?
IntroductionPART A Upload MediaStep 1 Navigate to the media and marketing sectionStep 2 Upload MediaStep 3 Tag Pictures and add description (optional)Step 4 Click on UploadPART B Create Before After ImagesStep 1 Navigate to the media and marketing sectionStep 2 Navigate to the before / after tab and click on "Check Here"Step 3 Add before and after treatment imagesStep 4 Tag Pictures and add description (optional)Step 5 Click on Upload